Setting up an exhaust valve controller comes down to five jobs: confirm the kit fits your valves, mount the control module away from heat, power it from a fused source and ground it to bare metal, connect it to the valves, and test both positions before you put the trunk back together. Most failed installs trace back to a weak ground, a hose or wire routed too close to the muffler, or a valve type that does not match the kit. This guide walks through each stage in order, with the checks that save you a second afternoon under the car.
TL;DR
- Identify your valve type first. Vacuum-actuated valves need a solenoid and a vacuum source. Electrically actuated valves use a motor and a harness or adapter.
- Mount the module in the trunk or cabin, power it from a fused circuit, ground it to clean bare metal and keep the antenna wire loose.
- Keep every wire and hose clear of exhaust heat, then test open, closed and remote range with the engine running.
- Check your state’s noise and emissions rules before you drive, and never touch emissions equipment.
Table of Contents
- What the controller actually does
- Step 1: Check compatibility before you order or open a box
- Step 2: Gather tools and prepare the car
- Step 3: Choose where the module goes
- Step 4: Wire power, ground and signal
- Step 5: Pair the remote and run a bench test
- Step 6: Confirm the valves open and close properly
- Troubleshooting: when something does not work
- Noise, emissions and inspection rules to check first
- Our perspective
- Shop parts that match your setup
- FAQ
- Sources
What the controller actually does
An exhaust valve is a pivoted flap inside the pipe or muffler. Closed, it forces gas through the quieter path. Open, it lets gas take the straight, louder route. Electronically controlled valves move that flap with an electric actuator, and smart versions carry integrated electronics that adjust the flap on commands from the engine control unit.
A controller kit sits between you and that flap. Instead of letting the car decide when the valves open, a small module takes input from a key fob remote or a phone and drives the valves directly. If you want the background on the module itself, our explainer on the role of the exhaust controller module covers it. For how the valves behave when the car is in charge, see how exhaust valves toggle automatically.
Step 1: Check compatibility before you order or open a box
Compatibility is the step people skip and regret. Work through these checks with the car in front of you.
- Valve actuation type. Get under the car and look at each valve. A small round canister with a rubber hose is a vacuum actuator. A small motor body with a multi-pin plug is electric. The two need different hardware.
- Number of valves. Many cars have one valve per side, some have a single valve, and some have extra valves in the front section. Count them, and note whether the kit drives them together or separately.
- Factory or aftermarket. A factory valved system may already have a connector you can intercept. An aftermarket valved exhaust usually ships with its own plug or leads, and the maker’s wiring diagram should win over any generic guide.
- Vacuum source. If the car uses vacuum valves, confirm there is a spare vacuum port or an existing solenoid line to use. Splicing into a critical vacuum line is a bad idea, because other parts may depend on it, the brake booster being the obvious one.
- Kit contents. You want the control module, remote or app receiver, power lead with fuse, ground lead, valve harness or solenoid, and mounting hardware. Missing pieces are far easier to find now than at 9 p.m. with the car on jack stands.
If you are choosing a system and not just a controller, our performance exhaust buyer’s guide explains how valve types differ between systems. Our exhaust system anatomy guide helps you find each component under the car.
Step 2: Gather tools and prepare the car
A basic install needs fewer tools than people expect:
- Jack stands or ramps (never work under a car held only by a jack)
- Socket set, usually metric 8, 10 and 13 mm for heat shield and trim bolts
- Trim removal tools for trunk or cabin panels
- Wire strippers, crimper and quality connectors, or posi-taps if the kit calls for them
- A multimeter for checking power, ground and continuity
- Zip ties, high-temperature wire loom and, for vacuum systems, heat-rated hose
- Penetrating oil, in case a valve is stiff
Let the exhaust cool completely before you touch it. Disconnect the negative battery terminal before any wiring work. On many modern cars that can reset settings or wake modules oddly on reconnection, so check your owner’s manual for battery disconnect guidance on your model.
If the exhaust is already off the car or you have the muffler section accessible, the job is much simpler. Heat shields are often held by six to eight small bolts, and loosening them gives access to the valve plug on many cars without dropping the whole system.
Step 3: Choose where the module goes
The module is not built for exhaust heat or water. Good locations share three traits: they are dry, they are well away from the exhaust, and they allow the remote signal to reach the module.
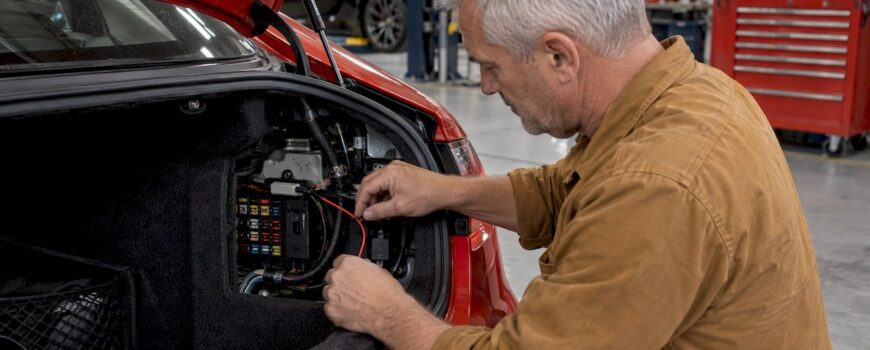
- Trunk, side panel area. The most common spot. It is dry, close to the rear valves and close to a fuse box on many cars.
- Behind a cabin panel or under a seat. Better signal, but longer valve wiring.
- Never directly on a heat shield, near the muffler or in a wheel well.
Mount it so it cannot rattle or slide. Double-sided automotive tape plus a zip tie is fine for a lightweight module, while a screw or bracket is better if the kit supports it. Keep the antenna wire stretched loosely and away from large metal panels, because a coiled or pinched antenna is a classic cause of poor remote range.
Step 4: Wire power, ground and signal
This is the stage where details matter most. Our exhaust valve wiring guide goes deeper, and the sequence below is the core of it.
Power
Tap a fused 12-volt source. Many owners use a spare slot in the trunk fuse box, or a fuse tap on a circuit that is live with the ignition. Decide whether you want the controller powered only with ignition on or always on. An always-on connection allows the remote to work with the car off, but it draws a small current continuously. Ignition-switched power is the safer choice if the car sits for weeks.
Put a fuse on the power lead as close to the tap as possible, and use the fuse rating in the kit instructions. Do not raise the rating to stop a fuse from blowing. A blowing fuse is telling you about a short.
Ground
Ground to bare, clean metal on the body or a factory ground stud. Sand off paint under the ring terminal, tighten it firmly, and check it later with a multimeter. A poor ground is the number one cause of a dead control box. A box with no light usually points to a bad ground or no power.
Valve connection
- Electric valves: plug the adapter or harness into the valve connector, or use the kit’s leads if the system is aftermarket. Follow the pin-out for your car or exhaust maker. Do not guess pin positions.
- Vacuum valves: install the solenoid in the vacuum line between the vacuum source and the valve actuator. Use a one-way check valve if the kit includes one, and point it the way the instructions show. A reversed check valve can leave the valve stuck.
If your car reads the valves through the engine computer, read our walkthrough on OBD integration for exhaust valves before you cut into factory wiring.
Route and protect
Run wires along existing looms, keep them away from sharp edges, moving suspension parts and exhaust surfaces, and secure them every 8 to 12 inches. Wrap wire near the exhaust in high-temperature loom. Vacuum hose near the muffler should be heat rated and shielded, since a melted line can leave the valve open and loud.

Step 5: Pair the remote and run a bench test
Before you reassemble anything, reconnect the battery and test with everything accessible.
- Confirm the module lights up or gives its normal power indication.
- Pair the remote or app following the kit’s instructions. Most kits have a learning or pairing procedure, and the order of steps matters.
- Press the open and close buttons and listen for the module’s audible response.
- With the engine running, watch the valve itself. You should see the flap move, or hear it, as you actuate the remote.
- Repeat from the driver’s seat and from outside the car to judge range.
If the valve moves, the electrical side works. If it does not, jump to the troubleshooting list below before you refit panels.
Step 6: Confirm the valves open and close properly
A valve that clicks is not necessarily a valve that moves. Test it three ways:
- By eye. With the engine off and the remote in the open position, a helper can look at the flap through the tip or at the actuator arm, and check that it travels the full range.
- By ear. Start the engine cold and cycle the remote. The difference between modes should be obvious at idle and under light throttle. If the sound does not change, the valve may be stuck or the wrong valve is being driven.
- By hand. With the system cool and the controller disconnected, move the flap by hand, if the design allows. Binding or heavy resistance means carbon buildup or corrosion.
Also check that the valve returns to its safe default if power is lost. Know which position that is for your system, because it decides what you hear if a fuse blows.
For how the changes sound inside the car, see how valve exhaust changes cabin sound. It also helps to know where valves are placed on luxury cars, since placement affects how much you hear change.
Troubleshooting: when something does not work
Work from the simplest check to the most involved.
| Symptom | Likely cause | What to check |
|---|---|---|
| Module has no light | No power or bad ground | Test the fuse, then ground continuity to bare metal with a multimeter |
| Module lights up but remote does nothing | Pairing lost or weak signal | Repeat pairing, replace the remote battery, straighten the antenna wire |
| Module clicks, valve does not move | Stuck valve, wrong output, or unplugged connector | Disconnect the controller, move the valve by hand, apply penetrating oil if it is stiff |
| Vacuum valve stays open | No vacuum, reversed check valve or melted hose | Feel for vacuum at the actuator line with the engine running, inspect the hose near the muffler |
| Valve works only sometimes | Loose connector or heat-damaged wiring | Wiggle-test the plugs, inspect loom near the exhaust |
| Warning light or fault code after install | Factory valve circuit sees the change | Read codes, then review the kit’s notes for your car |
A useful isolation trick is to take the controller out of the circuit. If the valve works on its own once you remove the controller, the controller is the suspect. If it still does not work, move to the vacuum supply or the valve itself. For a stiff vacuum-system valve, penetrating oil and operating it by hand often frees it.
Noise, emissions and inspection rules to check first
A valve controller changes how loud the car is, and it should never change what the emissions equipment does. The Clean Air Act prohibits tampering with emissions controls and aftermarket defeat devices, and the EPA’s enforcement policy says its civil enforcement generally focuses on companies that make or sell defeat devices and on shops that routinely delete emissions equipment. In practice, keep the catalytic converters, oxygen sensors and any particulate filters on the car, and wire the controller so it only moves valves.
Noise limits are set by state and local law, so they vary. Look up your state’s vehicle noise rule and your city’s ordinance, and consider leaving the valves closed in residential areas and early in the morning. A controller makes that easy.

Inspection requirements differ too. If your state inspects vehicles, a modified exhaust is a fair question to ask the inspection station ahead of time. In Texas, for example, an official station can explain what the Texas state inspection covers for your car. If your car is exotic or heavily modified, it also pays to know how upgrades interact with bodywork and insurance claims, as covered in this piece on modified exotic cars and collision repair.
Our perspective
We build our catalog around one idea: you should decide how your car sounds, not a fixed muffler. A well-set-up controller lets a luxury or performance car be quiet on the commute and loud on a back road, with one press of a remote.
That is why we focus on correct setup. We sell genuine products from authorized manufacturers across Audi, BMW, Porsche, Ferrari, Lamborghini, Mercedes-AMG and more, and a controller is only as good as the match between the kit, the valve type and the car. Matching those three before you start is the step that most improves the result.
Our approach is simple: identify the valve, wire it cleanly, protect it from heat and test it properly. Done that way, real-time control of exhaust sound is a feature you will use every day.
Info
Shop parts that match your setup
If you are ready to buy, we carry valved exhaust parts and accessories for European and luxury performance vehicles, with remote electronic valve control available for adjustable sound. Matching the part to your car and valve type before you order saves the most time on install day.

Browsing for a downpipe to go with the system? See our down pipe range. For a step-by-step view of a full system fit, our valve control exhaust installation guide is the next read, and the controller install guide covers the module in more detail.
FAQ
How long does an exhaust valve controller setup take?
Plan on an afternoon for a first install on a car with accessible valves and a trunk fuse box. Cars that need the heat shield loosened or the exhaust lowered take longer. Allow extra time for routing wire and testing, which is where most of the hours go.
Can I install a valve controller without removing the exhaust?
On many cars, yes. If the valve connector or vacuum line is reachable after loosening a heat shield, you can do the whole job from under the car on stands. If the valve is tucked above the muffler, lowering the system may be easier and safer.
Why does my remote work only up close?
The usual cause is the antenna wire, which may be coiled, pinched or lying against a large metal panel. Stretch it out, move it away from metal and try a fresh remote battery. If the range is still short, move the module to a spot with a clearer path to the cabin.
Will a valve controller make my car fail inspection?
A controller on its own does not change emissions equipment, but inspection rules differ by state and by station. Keep every emissions component in place and ask your local inspection station or state agency about modified exhausts before your test.
What should I do if the valves stay open or closed all the time?
First check power and ground at the module, then disconnect the controller to see whether the valve moves on its own. If it does not, check vacuum supply or free up a stiff valve. A melted vacuum hose or reversed check valve are common causes on vacuum systems.
Sources
- Active valves for hybrid vehicle exhausts: Sounding out Tenneco (just-auto)
- EPA Tampering Policy: Enforcement Policy on Vehicle and Engine Tampering
- Texas State Inspection in Plano, TX
- Modified Exotic Cars and Collision Repair