
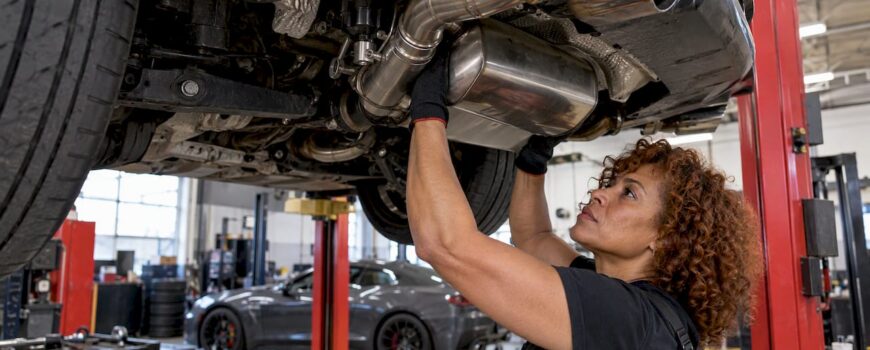
A valved exhaust installs like any other bolt-on exhaust, with one extra job: the valve actuator has to be connected, routed and tested so the system really switches between quiet and loud. Plan on a lift or jack stands, basic hand tools, penetrating oil and a free afternoon. Then spend the time on the parts that decide the result: alignment, clamp torque, wiring and a leak check. We sell valved systems, downpipes and controllers for European and luxury performance cars, so this is the routine we would hand a friend before they touch a wrench.
TL;DR
- A valved exhaust uses an electric actuator and a butterfly valve to switch between a quieter path and a freer, louder one, so installation is exhaust fitting plus valve wiring.
- Confirm the system is made for your exact model, engine and year before you unbolt anything. Fitment decides how easy the job is.
- Fit everything loosely first, align the pipes and hangers, then tighten the clamps last. Loose clamps cause leaks and rattles.
- Test the valve with the engine running, in the quietest mode first, then check every joint for leaks and every wire for heat and rubbing.
- Check federal and state rules before installing, because the EPA treats tampering with emissions equipment as a violation.
Table of Contents
- What you are actually installing
- Before you start: fitment and valve position
- Tools and safety
- Step-by-step: removing the stock exhaust
- Step-by-step: fitting the valved system
- Wiring the valve
- Testing: valve, leaks and sound
- Common mistakes
- DIY or a shop
- US rules to know before installing
- Our view: install it once, and get the fitment right
- Where to get the parts
- FAQ
- Sources
What you are actually installing
A valved exhaust has a butterfly valve built into the system. When the valve is closed, exhaust gas goes through the mufflers; when it opens, it bypasses them, which is why the same car can idle quietly and sound aggressive under load. A small electric motor moves the valve, and the car’s computer or a separate controller tells it when to move.
That gives you two sets of tasks:
- Mechanical: remove the stock section, fit the new pipes, mufflers and valve assembly, and seal and hang everything.
- Electrical: connect the valve actuator to the factory harness or to a controller and confirm it opens and closes.
Many cars already have factory actuators or a plug for them. On those, the aftermarket valve often reuses that connector, which keeps the electrical side short. On cars without one, a controller with its own harness does the job. Our guide to exhaust valve controller installation goes deeper on that side.
Before you start: fitment and valve position
Sixty seconds of checking here saves a lot of lost weekends.
Match the system to the car. Check make, model, generation, engine, drivetrain and whether your car has a particulate filter (OPF/GPF). Pipe diameters, flange shapes and hanger positions differ between variants of the same model. Our page on which valve control exhausts fit popular models is a good place to start narrowing it down.
Know where the valve sits. Sound-control valves belong in the rear section with the mufflers. Valves in the middle of a system serve other purposes and should not be treated as sound-control valves. Our breakdown of the three exhaust valve placement zones explains the difference.
Check the legal side first. The reader who buys a valved system for the street should know the rules before the old exhaust is in the trash. We cover them below, and in more depth in Keep Valved Exhausts Street Legal in the U.S..
Tools and safety
You do not need a race shop, but you do need the right basics.
| Item | Why you need it |
|---|---|
| Lift or four jack stands | You will be under the car for hours. Never rely on a jack alone. |
| Wheel chocks | Keeps the car from rolling while raised. |
| Socket set and wrenches (commonly metric on European cars) | Flange nuts, clamps and hanger bolts. |
| Penetrating oil | Old exhaust fasteners are rusted. Spray them the night before. |
| Exhaust hanger removal pliers | Rubber hangers are stubborn and easy to tear. |
| Oxygen sensor socket | Needed if sensors sit in a section you are replacing. |
| Torque wrench | Clamps and flange bolts should be tightened evenly and to the maker’s spec. |
| Gloves, safety glasses, long sleeves | Rust and debris fall straight down. |
| Second person or transmission jack | Mufflers and long pipes are awkward and heavier than they look. |
Two safety rules matter more than any others. Let the exhaust cool fully before you touch it, because it holds heat long after the engine stops. And disconnect the battery or switch the car fully off before unplugging any electrical connector.
Step-by-step: removing the stock exhaust
1. Lift and support the car
Raise the car level and support it on stands rated for its weight, on flat, solid ground. Chock the wheels that stay on the ground. Lay out new parts beside the car and compare them with the old ones before you start cutting or unbolting. Matching flanges and hanger points now beats discovering a mismatch with the car already apart.
2. Soak the fasteners
Spray penetrating oil on flange nuts, clamp bolts and hanger bolts. Leave it for several minutes, longer if the car has seen road salt.
3. Unplug anything attached to the exhaust
Oxygen sensors, temperature sensors and existing valve actuators have connectors that run along the underbody. Photograph each connector before you unplug it. If your car has factory valves, note which plug goes where, because you will reconnect the actuator later.
4. Support the system and release the hangers
Support the stock exhaust from below before releasing it. Pry rubber hangers off with hanger pliers rather than yanking the pipe, which can crack welds or damage the hangers you plan to reuse. Work from the rear forward, and keep one hanger on until a helper or jack takes the weight.
5. Separate the joints and lower the system
Undo the clamps or flange bolts at each joint. A few taps with a rubber mallet help break a seized slip joint. Lower the sections and slide them out. Keep the factory gaskets and hardware in a labeled bag until the new system is on, in case a fitting matches.
Step-by-step: fitting the valved system
6. Clean the mating surfaces
Wire-brush rust and carbon off the flange faces and the pipe ends where clamps will sit. A clean surface seals; a crusty one leaks. Fit new gaskets where the system calls for them.
7. Hang everything loosely
Start at the front, or at the rear, as the system’s instructions say, and connect each section with clamps or bolts only finger-tight. The pipes should be able to move a little. This is the most important habit in any exhaust job: do not fully tighten anything until the whole system is in place.
8. Align the system
With everything loose, walk around the car and check:
- Tailpipes are centered in the bumper cutouts, with even gaps left and right.
- Pipes clear the subframe, driveshaft, fuel lines, brake lines and the floor by a hand’s width wherever you can manage it.
- Hangers sit without pulling the system sideways, and the valve actuator has room to move and is away from the hottest pipe surfaces.
- Slip joints are inserted the amount the instructions state, with the clamp over the overlap.
Shift pipes in small increments. Most misalignment you notice later shows up as a rattle at a particular rpm, and it is almost always a pipe that was closer to the body than it should have been.
9. Tighten from the middle outward
Once the alignment is right, tighten the clamps and flange bolts evenly and in stages, switching sides on a multi-bolt flange, until you reach the torque in the instructions. Every clamp must be properly tight, because a loose clamp leaks exhaust, and a leak both ruins the sound and can draw fumes toward the cabin. Do not use an impact wrench on clamps that the instructions say to hand-tighten, since it can crush or strip them.
Wiring the valve
This is where valved installs differ from a plain cat-back, and where most mistakes happen.
10. Connect the actuator
Turn the car fully off. Depending on the system, one of two setups applies:
- Factory actuator plug: unplug the factory connector, then connect it to the controller or to the aftermarket actuator’s matching plug, as the instructions for your system show.
- Standalone controller: mount the receiver or control module somewhere cool and dry, run its harness to the actuator and to a switched power source as directed, and fuse the circuit if instructed.
Push every connector in until it clicks. A partly seated connector is the usual reason a valve works on the bench and not on the road.
11. Route the harness
At this point, check the wiring along its whole length. It must stay clear of the hot exhaust, away from sharp edges and anywhere it could rub or get pinched when the suspension moves. Use the supplied clips or zip ties, leave a little slack for engine movement, and avoid bundling a harness tight against a hot pipe. Damage from heat or abrasion can take weeks to show up, so it is cheaper to do this carefully now.

12. Do not install a controller on the wrong valve
Controllers are made for valves whose job is sound control in the muffler section of a petrol car. Treat any valve elsewhere in the system, or any diesel exhaust valve, as a different component with a different purpose, and leave it on factory control.
Testing: valve, leaks and sound
13. Test the valve action
Start the car in its quietest drive mode and give the valves a moment to close. Then trigger the open position from the controller or remote and listen: the note should change clearly. Return it to the closed or factory setting and confirm the valves close again. If the car has a drive-mode system, cycle through the modes too. If nothing moves, shut the car off and recheck the connector seating, fuse and ground before anything else.

14. Check for leaks
With the engine running, hold a gloved hand a few inches from each joint, carefully, and listen for ticking or hissing. A rag or soapy water won’t help on a hot pipe, so let it cool, then check clamps again. Leaks at slip joints usually mean the clamp needs a quarter turn or the pipes need re-seating.
15. Take a short drive and retighten
Drive a few miles, including some cruising and some load with the valves open and closed. Listen for drone, rattles or buzzing. After the system has gone through a few heat cycles, recheck clamp tightness and hanger positions, since metal and rubber settle.
Common mistakes
- Fully tightening before aligning. The most common reason for a rattle.
- Reusing a tired hanger. A cracked rubber hanger lets the pipe swing into the body.
- Ignoring the wiring path. Heat and rubbing kill harnesses.
- Assuming every valve is the same. Valve type and location differ, so follow the instructions for the specific system.
- Skipping the retorque. Clamps relax after heat cycles.
- Forgetting the paperwork. Keep any compliance paperwork that comes with the parts, which matters in states with exhaust rules.
DIY or a shop
A straightforward cat-back on a car that sits easily on stands is a realistic weekend job for a confident home mechanic. Turbo-back systems, downpipes with sensors, cars with particulate filters and anything with welded or seized hardware is where a shop with a lift earns its fee. Shop labor varies widely by region and platform, so get a written quote for your car and ask whether it includes the valve wiring. If you are a mechanic or tuner fitting these for customers, the same sequence applies: loose fit, alignment, staged torque, wiring check, leak check, road test, retorque.
US rules to know before installing
Federal law is the rule that matters most. The EPA’s tampering policy explains that the Clean Air Act prohibits tampering with emissions controls on the exhaust, such as catalysts and filters, and prohibits aftermarket defeat devices. The same policy lists civil penalties of up to $4,819 per act for individuals and up to $48,192 for manufacturers and dealers.
In practice that means a valved exhaust for the street should leave the catalytic converters, filters and sensors your car came with in place and working. Our EPA exhaust tampering checklist walks through that for luxury owners.
Noise and inspection rules vary by state and sometimes by city, so look up your state’s requirements before you buy. California is the strictest in this area. Two of our guides cover the practical side: how to pass an aftermarket exhaust inspection and exhaust noise regulation for US drivers. One useful habit: keep the valves in their quiet position around residential streets, inspections and anywhere noise is policed.
Our view: install it once, and get the fitment right
We see valved exhausts as the one modification that lets a car have two personalities. A closed valve gives you a car you can drive to dinner without drone, and an open valve gives you the sound you bought it for. That control is the point of the system, and it is why we build our range around remote electronic valve control.
Installation goes best when the part fits the car it was made for. That is why we focus on compatibility across European and luxury performance brands such as Audi, BMW, Porsche, Ferrari, Lamborghini and Mercedes-AMG, and why we sell genuine products from authorized manufacturers. A system that matches your model’s flanges, hanger points and valve connection turns a long day into a short one.
If you are choosing between a fixed exhaust and one with adjustable valves, think about how you drive. Commutes, highway cruising and weekend runs all want different sounds, and only a valved system covers all of them.
Info
Where to get the parts
Once you know your car and your plan, you can shop by what you need. We carry valved exhaust parts, downpipes and accessories for European and luxury performance vehicles, including controllers and tips. Browse exhaust parts for the exhaust sections and valve hardware, downpipes if you are working at the front of the system, and accessories for the finishing parts.

If you are comparing systems before you buy, our performance exhaust buyer’s guide lays out the options for luxury and performance cars. Start your order from the Valve Control Exhaust store.
FAQ
How long does a valved exhaust installation take?
A cat-back on a car that is easy to reach is commonly a few hours for a prepared home mechanic. Rusted hardware, sensors, a downpipe or a second person’s absence stretches that out. Plan for an afternoon and do not rush the alignment and leak check.
Can I reuse my factory valve actuators?
On many cars, yes: the aftermarket valve can use the factory actuator connection, which simplifies the wiring. Confirm that for your exact model before you buy, and keep the factory connector labeled so you can reconnect it correctly.
Does a valved exhaust make the car legal?
The valve itself does not decide legality. Emissions equipment must stay in place and working under federal rules, and state noise and inspection rules still apply, so check your state’s requirements before installing.
What should I do if the valve does not move after installation?
Turn the car off and recheck the basics in order: the connector is fully seated, the fuse is intact, the ground is solid and the wiring is not pinched. Then retest from the quietest mode so the valves start from the closed position.
Sources
- GM Authority: GM Dual-Mode Exhaust technology
- EPA Tampering Policy: enforcement policy on vehicle and engine tampering