
Yes, most drivers with factory electronic exhaust valves can integrate an OBD-controlled valve system right now, and the fastest, safest route is almost always a plug-and-play OBD2 controller. If your car lacks a CAN-readable valve signal or runs vacuum-actuated valves instead, you’re looking at hardwired integration or a professional install. Before you buy anything, run these checks:
- Confirm your car has factory electronic exhaust actuators, not vacuum-only valves.
- Verify the CAN/OBD2 data stream actually carries valve command messages.
- Disconnect the battery before any hardwiring work and note your baseline diagnostic trouble codes (DTCs).
- Back up your ECU configuration if your tuning software supports it.
Key Takeaways
Successful OBD exhaust valve integration depends on confirming CAN compatibility first, choosing plug-and-play over hardwiring whenever possible, and verifying valve response before and after installation.
| Point | Details |
|---|---|
| Check compatibility first | Confirm electronic actuators, CAN valve messages, and any security gateway before buying hardware. |
| Prefer plug-and-play | A reversible OBD2 module avoids wire splicing and is the fastest safe route for most factory-wired cars. |
| Hardwire only when necessary | Reserve hardwiring for SGW-blocked, vacuum-actuated, or CAN-invisible valve systems. |
| Use load-based auto triggers | Manifold pressure or throttle-based triggers avoid the jerky behavior RPM-only triggers create. |
| Source tested hardware | Valvecontrolexhaust supplies valve controllers and exhaust components matched to specific luxury and performance chassis. |
Table of Contents
- What Is OBD Integration Exhaust Valve Setup and Which Cars Qualify?
- How Do You Install a Plug-and-Play OBD Valve Controller?
- When Do You Need Hardwired Exhaust Valve Wiring Instead?
- Which Valve Mode Should You Use for Sound vs. Performance?
- Why Is My Exhaust Valve Controller Throwing a Check Engine Light?
- Is Modifying Your Exhaust Valve Legal and Safe?
- How Does Valve Position Actually Change Backpressure and Torque?
- Get Reliable Valve Control Hardware Built for Your Car
- Frequently Asked Questions
- Sources
What Is OBD Integration Exhaust Valve Setup and Which Cars Qualify?
An OBD-integrated exhaust valve setup uses your car’s OBD2 port or CAN bus to intercept or send the commands that open, close, or modulate the exhaust valve actuators. It’s not the same as a purely mechanical valve system, and knowing the difference determines whether you’re plugging in a module this weekend or scheduling a shop visit. Confirm compatibility before you spend a dollar.
Check these items on the car itself:
- Actuator type: electronic (motor-driven flap, common on modern BMW, Audi, Porsche, and Mercedes-AMG models) versus vacuum-actuated (older setups that need a different intercept strategy).
- CAN bus visibility: does a CAN scanner show valve-related message IDs, or does the manufacturer wall off that data behind a secure gateway (SGW)?
- Factory harness and connectors: locate the actuator’s OEM plug and pinout so you know what you’re tapping into.
- Security gateway presence: some newer chassis, including certain Alfa Romeo Giulia and Stelvio Quadrifoglio models, require an SGW bypass before any OBD-based controller works.
Tools worth having on the bench: an OBD2 dongle or reader, a multimeter, basic hand tools, a CAN tap kit if you’re going hardwired, dielectric grease, cable ties, and a scanner capable of reading CAN-specific DTCs. A quick pass with a proper diagnostic tool before you touch anything tells you whether your valve responds to the factory dash button or drive mode selector, which is your clearest sign the valve messages exist on the bus at all.
How Do You Install a Plug-and-Play OBD Valve Controller?
Plug-and-play OBD controllers are the least invasive way to get real-time valve control, and for most factory-wired cars the whole process takes under an hour.
- Plug the module into the OBD2 port. No wire splicing, no cutting. This is why vendors like MotorCom and Burger Motorsports build their controllers around a direct OBD2 connection for BMW F and G chassis platforms.
- Tuck the module out of sight. Most OBD dongles sit low near the pedal box; secure it so it doesn’t rattle or interfere with pedal travel.
- Pair the companion app or physical switch. Controllers like the 992noise system for Porsche 992 pair over Bluetooth or CarPlay in roughly 15 to 20 minutes and can show live valve position data once connected.
- Set your default mode. Choose Open, Closed, or Factory/Auto as your baseline before you drive anywhere.
- Test while parked. Rev the engine gently in neutral and listen for the valve actuator moving between states. You should hear a distinct mechanical shift, not just an exhaust note change.
- Road-verify, then reassess. Drive a short loop, cycle through modes, and rescan for new codes.
Verification matters more than installation speed. After pairing, watch for actuator feedback confirming the valve actually reached the commanded position, not just that the app sent the command. Rescan with your OBD tool immediately after install and again after a short drive; a clean scan both times means the module isn’t fighting the ECU for bus priority.
Keep the module fully removable. Never cut factory wiring for a plug-and-play install; if you can’t restore stock behavior by unplugging one connector, you’ve turned a reversible upgrade into a permanent modification.
Pro Tip: Run your first road test between 2,000 and 4,000 RPM at steady throttle, then repeat under light acceleration from a stop. This window exposes CAN arbitration conflicts faster than idling ever will, since that’s where most controllers issue their first mode-switch commands.
When Do You Need Hardwired Exhaust Valve Wiring Instead?
Hardwiring becomes necessary when OBD plug-and-play simply can’t reach the valve. That happens on three occasions: your vehicle runs a security gateway that blocks third-party OBD interception, your valves are vacuum-actuated rather than electronic, or your specific model never puts valve commands on the CAN bus at all.
The core wiring tasks look like this:
- Identify the actuator’s OEM connector and confirm pinout before cutting anything.
- Isolate a clean ignition-switched power feed rather than tapping a random accessory circuit.
- Install an inline fuse sized to the actuator’s draw, plus a relay if the controller can’t handle the current directly.
- Wire a solid ground return, and protect signal lines with diodes or opto-isolation where the controller shares a circuit with sensitive electronics.
A detailed walkthrough of connector pinouts and wiring sequences is worth reading in full before you start, since getting the ground path wrong is the single most common cause of intermittent valve behavior.
Always disconnect the battery before starting, torque connector terminals to spec rather than eyeballing it, and never splice into live CAN high/low wires unless you genuinely understand message arbitration. A botched CAN splice doesn’t just kill your valve controller. It can throw unrelated systems into fault mode.

Pro Tip: If your car has a factory SGW, like several recent Stellantis and FCA platforms, don’t fight it alone. Hire a shop with a proper gateway bypass tool. Guessing at security gateway workarounds risks bricking modules that have nothing to do with your exhaust.
Which Valve Mode Should You Use for Sound vs. Performance?
Three modes cover almost every controller on the market: OPEN holds the valves open regardless of conditions, CLOSE holds them shut, and AUTO follows programmable triggers based on RPM, road speed, throttle position, or engine load.
Start conservative. Adjust in small increments and drive between each change rather than tuning five parameters at once.
- Open valves lower exhaust restriction, which can reduce pumping losses under certain load conditions.
- Closed valves at low load preserve exhaust gas velocity, improving scavenging and cutting cabin drone.
- Load-based triggers (using manifold pressure or throttle position rather than RPM alone) avoid the jerky valve behavior that shows up when you rely on RPM during quick throttle transients.
Advanced controllers, including the VAREX Smartbox system, let you fine-tune valve position in 1% increments and layer in GPS-based triggers, which is worth exploring once your basic RPM/throttle map feels solid.
Pro Tip: Favor load-based triggers over RPM-only ones. A car lugging up a hill at 2,500 RPM under heavy throttle needs a different valve state than one coasting at 2,500 RPM on flat ground, and RPM alone can’t tell the difference.
Why Is My Exhaust Valve Controller Throwing a Check Engine Light?
Run a baseline scan before install and a follow-up scan immediately after. That single habit catches most problems before they become mysteries.
- Pairing failures usually trace back to Bluetooth interference or an app version mismatch. Reset the module and re-pair from scratch before assuming hardware failure.
- A stuck valve can be mechanical (corroded actuator, worn linkage) or electrical (broken wire, bad ground). Measure actuator resistance and supply voltage to tell which.
- CAN ID conflicts show up as intermittent, hard-to-reproduce codes. If they appear only after install, the controller is likely competing with a factory module for the same message ID.
- Memory not persisting between restarts usually points to a power feed that’s switched off completely at shutdown rather than held on a keep-alive circuit.
Keep a written log of every DTC and the test you ran to chase it. That log is exactly what a tuner or technician will ask for first, and it can cut a diagnostic session from hours to minutes. For a deeper walkthrough of specific fault patterns, see this troubleshooting guide for valve control exhaust systems.
Is Modifying Your Exhaust Valve Legal and Safe?
Noise and emissions rules vary significantly by location, so check your local regulations before making any permanent change. What’s legal on a closed track may not be legal on public roads in your area.
Never disable emissions sensors to work around a check-engine light, and never ignore a CEL and keep driving hoping it resolves itself. Any hardwired install needs proper fusing and a solid ground; a floating ground on an actuator circuit is a fire risk, not just an annoyance.
Stick to reversible plug-and-play modules when you can, document your stock wiring before any hardwire work so you can revert cleanly, and use your app or switch to cap how often high-decibel modes trigger, particularly near residential areas or noise-monitored events.
Maintenance and Reliability Tips After Installation
- Check connector tightness and inspect actuator boots for corrosion or cracking.
- Confirm your controller’s firmware is current; manufacturers push updates that fix pairing bugs and CAN compatibility.
- Re-verify valve operation any time you disconnect the battery, since some controllers lose their saved mode.
- Inspect after the first 100 miles, monthly for daily drivers, and always before a long trip or track day.
How Does Valve Position Actually Change Backpressure and Torque?
Valve position changes exhaust restriction directly, which is why it affects backpressure, scavenging, and torque in fairly predictable ways rather than randomly.
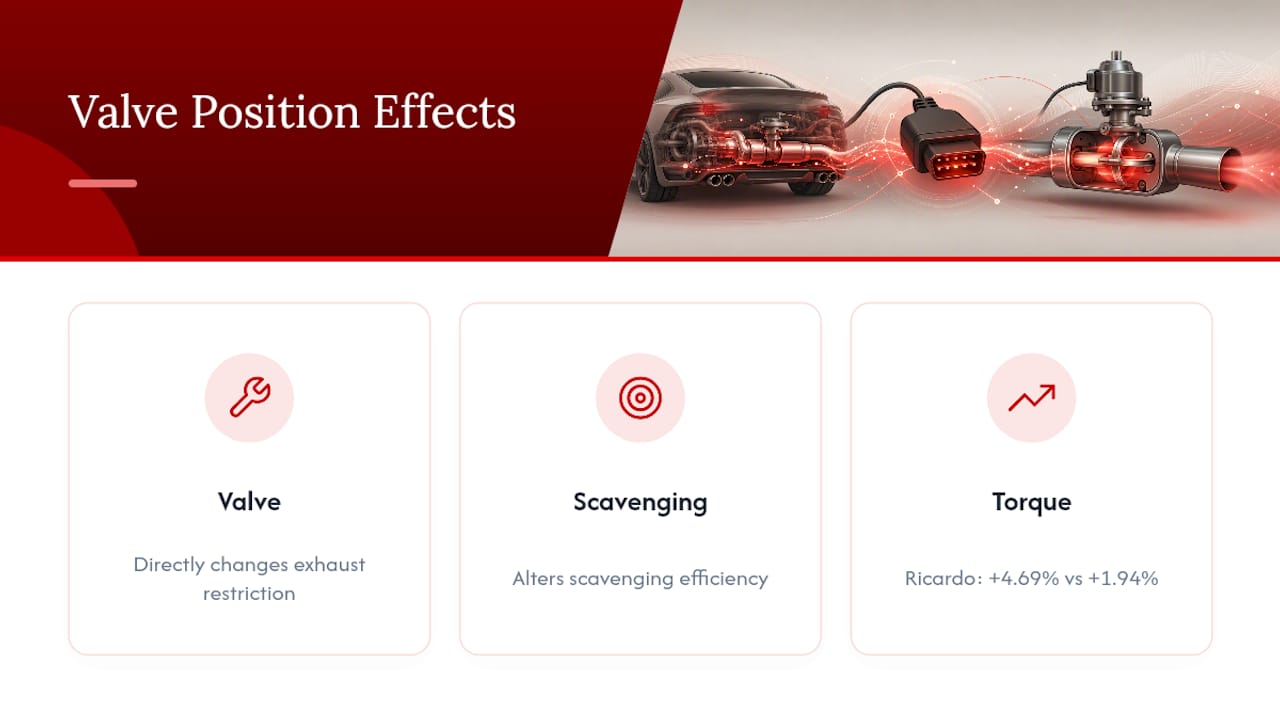
A Ricardo Wave simulation study found that combining exhaust runner diameter changes with valve timing adjustments produced an average torque improvement of about 4.69% across the tested speed range, while valve timing changes alone produced a smaller average gain of roughly 1.94%. Separate numerical modeling of variable valve timing strategies found some approaches reduce pumping loss and boost volumetric efficiency in specific speed bands, while other strategies actually increase pumping loss at low speed, which is exactly why load-aware auto triggers outperform RPM-only ones. If you want to measure your own before-and-after, log RPM and torque with a scan tool or run a proper dyno pull rather than trusting seat-of-the-pants impressions. For more on why variable valve systems outperform fixed exhausts in these scenarios, see this technical breakdown.
When Should You DIY vs. Call a Professional?
DIY a plug-and-play OBD module on a common chassis with visible CAN valve data. Hire a professional for secured-gateway vehicles, vacuum-actuated systems, or anything requiring full CAN bus analysis. When in doubt, a specialist installer network saves you from an expensive mistake.
Get Reliable Valve Control Hardware Built for Your Car
Sourcing a controller off a forum thread is one path, but it leaves you guessing about fitment, firmware support, and whether the module was actually engineered for your chassis. Valvecontrolexhaust builds and sells valve controllers and complete valved exhaust components specifically matched to Audi, BMW, Porsche, Ferrari, Lamborghini, and Mercedes-AMG platforms, so you’re not adapting a generic dongle to a car it was never tested on.
If your car needs more than a controller, from downpipes to mufflers to rear diffusers, Valvecontrolexhaust’s performance exhaust buyer’s guide breaks down system-level options for the same luxury and performance chassis this article covers. If your priority is customizing valve response and mode behavior specifically, the exhaust valve customization page walks through what’s configurable on their controllers. Check fitment for your model and place an order through Valvecontrolexhaust’s product pages to get a controller built for your exact chassis rather than a universal fit.
Frequently Asked Questions
Does an OBD exhaust valve controller trip a check engine light?
Not if installed correctly. Most CELs trace back to CAN ID conflicts or a controller intercepting a message the ECU still expects to see. Scanning before and after install catches this early.
Can I use an OBD valve controller on a car with vacuum-actuated valves?
No. OBD-based controllers work with electronic actuators that respond to CAN commands. Vacuum-actuated valves need a solenoid-based intercept instead, which is a hardwired job.
Will a plug-and-play module leave permanent marks on my car?
No, that’s the appeal. Controllers like the Burger Motorsports OBD2 CANbus module plug into the OBD2 port with zero wire splicing, so removal restores stock behavior instantly.
What’s the difference between OPEN mode and AUTO mode?
OPEN holds valves open constantly, maximizing sound and reducing backpressure at all times. AUTO follows your programmed triggers, typically RPM, throttle, or load, switching states dynamically for a balance of quiet cruising and aggressive sound under load.
Does opening the exhaust valve always add horsepower?
Not always, and not by much on its own.
Sources
- Exhaust valve control and effects on pumping losses and scavenging (MDPI, Energies)
- Simulation study: exhaust runner diameter and valve timing effects on torque (DOI:10.3390/en11061545)
- Variable valve timing tuning study (MATECCONF)