
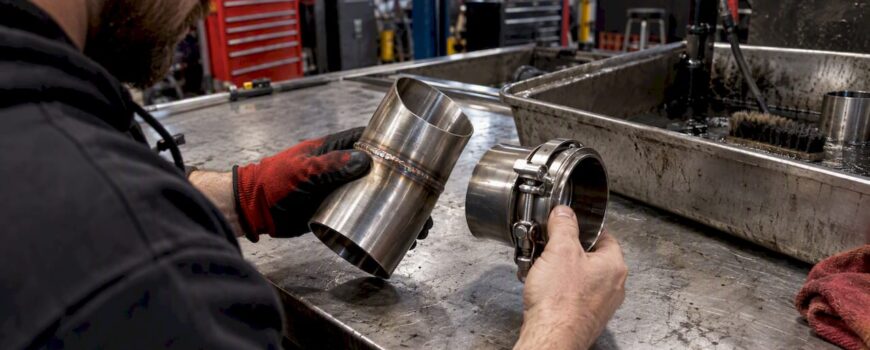
Welding wins for permanent, gas-tight joints that need to survive years of heat and vibration, while quality clamps, especially V-band and rated band clamps, suit modular builds or sections you expect to service later. Either method fails if the workmanship is sloppy: a bad weld leaks as badly as a loose clamp. The method matters less than how well it is done.
TL;DR:
- For removable sections, choose a gasketed V band, align the joint, follow specified tightening steps, and recheck torque after the first heat cycles.
- Thin stainless tubing favors TIG welding; match filler metal, use an inert gas purge when needed, and inspect each bead for porosity or incomplete penetration.
- Welded sections require cutting or grinding for removal; V band joints come apart with a wrench, and frequently accessed connections need replacement gaskets.
- Exhaust leaks can expose occupants to carbon monoxide and trigger sensor codes; check for soot or hissing, and stop driving if exhaust reaches the cabin.
Table of Contents
- How clamps work and the main types you’ll run into
- How welding works and what a good exhaust weld requires
- Sealing, strength, and how each method holds up over time
- Choosing materials and protecting joints from heat and corrosion
- What installation actually takes: tools, time, and cost
- When clamps make sense and where they fall short
- When welding is the right call and how to confirm it’s done right
- How your choice affects future repairs and maintenance
- Safety risks from leaks: carbon monoxide and sensor errors
- Our take on clamps vs welding for performance exhaust builds
- Finding the right parts for your exhaust repair or build
- FAQ
- Sources
How clamps work and the main types you’ll run into
A clamp creates a seal through radial compression: it squeezes two pipe ends, or a pipe and a flange, tightly enough that gas can’t escape between them. The clamp doesn’t fuse metal to metal, so the quality of the fit between the parts matters just as much as the clamp itself.
The common types each solve a different problem:
- V-band clamps wrap around a V-shaped flange on each pipe and draw them together with a single bolt or lever, giving even pressure around the full circumference. They’re the standard choice for modular valved systems and turbo connections because they come apart quickly for service.
- Flat-band (seal) clamps use two bolts across a wide band to compress a lap joint, often with a gasket, and work well on slip-fit sections of the mid-pipe or muffler.
- U-bolt clamps are simple and cheap, gripping a pipe against a saddle, but they concentrate force at two points rather than around the pipe, which limits their sealing reliability.
- Worm or band clamps (similar to a hose clamp) are fine for low-pressure, low-heat sections but are not a structural fix anywhere near an exhaust joint.
Whichever type you choose, alignment comes first: pipe ends need to meet squarely, gaskets (where specified) need to sit flat, and bolts should be tightened in an alternating pattern rather than one side at a time. Manufacturer installation instructions for flat-band clamps call for alternating torque and specify fastener grades, and skipping that sequence is a common reason clamps leak soon after installation.
How welding works and what a good exhaust weld requires
Welding fuses the pipe material itself, so there’s no mechanical joint to loosen over time, just a continuous piece of metal. For thin-wall exhaust tubing, the welding process you pick changes the outcome:
- TIG welding gives the most control over heat input and is the preferred method among fabricators working with stainless exhaust tubing, since it limits burn-through and produces a cleaner, more consistent bead.
- MIG welding is faster and more forgiving for carbon steel sections, though it’s harder to dial in on thin stainless without blowing through the wall.
- Stick welding is rarely practical on exhaust-gauge tubing; it’s suited to thicker material and isn’t the right tool for this job.
A competent exhaust weld shows full penetration through the joint, a consistent bead with no visible porosity, and filler metal matched to the base material (304 or 321 filler for stainless, for example). Porosity or incomplete penetration isn’t just cosmetic: CDC guidance on carbon monoxide notes that even minor weld porosity or incorrectly torqued clamps can let hazardous gas escape and trigger diagnostic trouble codes.
Amperage depends on wall thickness. Thin exhaust tubing of small typical wall thickness typically welds in a moderate TIG amp range suitable to the material and thickness, while thicker downpipe sections may need more. Stainless sections sometimes call for a backing purge of inert gas inside the pipe to stop oxidation on the inside of the weld, particularly on header and downpipe runs.
Pro Tip: Tack the joint in three or four spots before running a full bead; it keeps the pipe from warping out of alignment as the metal heats and cools.
Sealing, strength, and how each method holds up over time
A welded joint is a single piece of metal: there’s no gap for gas to find, and nothing to loosen under vibration. A clamp relies on compression holding steady over thousands of heat cycles, which is a different kind of challenge.
- Sealing: welds form a continuous barrier; clamps depend on consistent radial force and, often, a gasket. A properly torqued V-band with machined flanges can approach weld-level gas-tightness, which is why V-band clamps are standard on many modular performance systems where uniform flange pressure and proper gaskets are used.
- Strength under load: a weld resists separation from vibration and thermal expansion far better than a clamped joint, which can work loose if bolts aren’t re-torqued after the first heat cycles.
- Vibration and rattling: clamped sections, especially those without a gasket, are more prone to developing a rattle as the clamp and pipe wear against each other.
- Longevity and failure modes: clamps fail mostly through bolt fatigue, corrosion, or gasket breakdown; welds fail through cracking at the weld toe, usually from repeated flexing or a poor original weld.
Choosing materials and protecting joints from heat and corrosion
Material choice affects both methods, but it matters more on welded joints since you’re married to whatever you fuse together. Stainless steel, specifically 304 or 321, is the standard for headers and downpipes because it tolerates the highest temperatures without scaling or cracking. 321 stainless holds up well above 850°C, which is why it shows up near the engine rather than further back in the system. Aluminized or plain carbon steel is cheaper and fine for mid-pipes and mufflers, where temperatures are lower, but it corrodes faster over time.
Thermal cycling is the quiet enemy of both joint types:
- Repeated heating and cooling expands and contracts the pipe, which can gradually loosen a clamp’s bolts if they aren’t checked after the first few drive cycles.
- The same cycling stresses the toe of a weld, where cracks tend to start if the original weld had any porosity or thin spots.
- Mixing metals, such as a carbon steel clamp on a stainless pipe, invites galvanic corrosion at the contact point, which can seize the clamp or pit the pipe surface.
Once a clamp shows surface rust or pitting, replace it rather than reuse it. A corroded clamp won’t apply even pressure, and the hardware is cheap compared to the leak it can cause.
What installation actually takes: tools, time, and cost
Clamp installation needs a torque wrench, the correct socket or wrench set, and, for flange joints, the right gasket. Most jobs take under an hour and cost far less than a welded repair, since there’s no equipment rental or welding skill required.
Welding needs more:
- A welder, ideally a TIG unit for stainless, set to an amperage matched to wall thickness (roughly 60 to 90 amps for typical exhaust tubing).
- Filler rod matched to the base metal, plus argon shielding gas and, on stainless, sometimes a backing purge to protect the weld from the inside.
- Safety gear: a welding helmet, gloves, and a well-ventilated space, since welding produces fumes that shouldn’t be breathed in an enclosed garage.
- Time and skill: a clean exhaust weld on thin tubing takes practice. A rushed weld on stainless is more likely to show the porosity that leads to leaks.
Factor in labor if you’re paying a shop. A full-service repair shop with ASE-certified technicians will typically charge more for a welded repair than a clamp-on fix, reflecting the equipment and skill involved, though the finished joint should last considerably longer. The setup of the machine and the welder’s technique matter more than raw amperage: a skilled welder at the low end of the amperage range will outperform an unskilled one running hot.
When clamps make sense and where they fall short
Clamps earn their place in a few clear situations: modular systems where you want to swap a muffler or resonator, roadside or temporary fixes to get a car moving, and non-structural joints that don’t carry serious mechanical load.
A clamp-only solution should meet a few criteria before you trust it:
- Use a stainless clamp, not a bargain-bin carbon steel one that will rust within a season.
- Pair it with a gasketed or V-band connection rather than a bare slip joint, especially anywhere upstream of the muffler.
- Torque it correctly and check alignment before final tightening; a crooked joint will leak no matter how hard you tighten it.
Clamps have real limits. A basic hose clamp is never an acceptable permanent fix on an exhaust system, and clamping onto a badly corroded or deformed pipe end just traps the problem instead of solving it. If the pipe itself is compromised, replace that section before clamping anything to it.
When welding is the right call and how to confirm it’s done right
Welding is the better choice for permanent repairs, structural joints, and anywhere gas-tight integrity really matters, such as header flanges and other high-temperature connections close to the engine. Professional advisories recommend replacing worn or defective exhaust components rather than patching them in safety-critical spots, which lines up with choosing a weld over a quick clamp fix in those locations.
A good weld should pass a few checks before you trust it on the road:
- Visual inspection: a consistent, even bead with no pinholes, cracks, or discoloration from overheating.
- Leak check: a soap-and-water test or a shop smoke machine will reveal any gas escaping at the joint.
- Penetrant or magnetic testing, if available, can catch hairline cracks that aren’t visible to the eye.
A careful hobbyist with a TIG welder and some practice on scrap tubing can produce a reliable weld. Anything near a header flange, a catalytic converter, or a spot that’s hard to inspect later is worth handing to a professional.
How your choice affects future repairs and maintenance
Watch for soot streaks, white or rust-colored stains, a ticking or hissing sound near a joint, or a check engine light tied to an oxygen sensor code. Any of these point to a leak worth tracing before it gets worse. Our guide to spotting exhaust leak symptoms early walks through what to look and listen for.
Removing a welded section means cutting or grinding it out, then either re-welding a new piece or installing a flange adapter so the next repair doesn’t require cutting again. Clamped joints, by contrast, come apart with a wrench, which is the whole appeal of a V-band on a valved or modular system.
- If you expect to revisit a joint for upgrades or service, a clamped connection saves time and labor over its life.
- If the joint is permanent and out of sight, a weld avoids repeated maintenance entirely.
Pro Tip: Keep a spare gasket and clamp on hand for any V-band joint you access often; gaskets compress and wear out well before the clamp itself does.
Safety risks from leaks: carbon monoxide and sensor errors
Carbon monoxide is colorless and odorless, and CDC guidance warns that even small leaks can let hazardous gas reach the cabin. The same leaks often throw oxygen sensor codes or reduce catalytic converter effectiveness, showing up as rough idle or poor throttle response before you notice any smell.
A poorly sealed joint, whether welded or clamped, is the common thread behind both CO exposure and drivability complaints. Treat it as a safety issue, not just a performance one.
If you suspect a leak, inspect visually for soot or stains, listen for a hiss near joints, and get a smoke or pressure test done if the sound or codes persist. Stop driving the car if you smell exhaust inside the cabin or suspect CO is entering the passenger space.

Our take on clamps vs welding for performance exhaust builds
Modular valved systems rely heavily on V-band clamps because serviceability is the point: you need to pull a section for a sensor, a valve actuator, or a tune change without cutting metal. We build around that reality rather than against it.
Our recommendation stays consistent: weld where structural integrity and permanence matter most, and use a properly gasketed, correctly torqued V-band where removability and tuning flexibility come first. Neither choice is a shortcut around good workmanship.
— Info
Finding the right parts for your exhaust repair or build
Whether you’re welding in a new downpipe or adding a V-band to make a section serviceable, the fit of your exhaust parts and downpipes determines how well either method holds up.

Our store offers components from authorized manufacturers, compatible with a variety of European and luxury performance vehicles, so you’re not stuck adapting a part that was never meant for your flange pattern. Our accessories category covers gaskets, clamps, and hardware if you’d rather clamp a section than cut and weld. Browse the exhaust parts and downpipe pages for your model, or reach out if you’re not sure which fitting matches your current setup.
FAQ
Do exhaust clamps really work?
Yes, when they’re the right type for the job and installed with correct torque and alignment. A quality V-band or gasketed flat-band clamp can hold a reliable, long-lasting seal on modular or slip-fit sections.
Will exhaust clamps leak?
They can, usually from under-torquing, a misaligned joint, or a worn gasket rather than a flaw in the clamp design itself. Following the manufacturer’s torque and tightening sequence greatly reduces that risk.
How many amps do I need to weld an exhaust pipe?
Thin exhaust tubing typically welds well in the 60 to 90 amp range on a TIG machine, with the exact setting depending on wall thickness and material. Technique and machine setup matter more than the amperage number alone.
How long will a welded exhaust last?
A properly executed weld on the right material, such as 321 stainless near the header, can outlast the rest of the vehicle since there’s no mechanical joint to loosen or wear out. Failures usually trace back to original weld defects or repeated thermal stress rather than the weld simply aging out.
Sources
- CDC: Carbon Monoxide (CO) — NIOSH
- FAA Safety presentation: Exhaust Systems (slides — V-band guidance)
- Flat Band SealClamp™ Installation Instructions (Donaldson product catalog)
- NTSB Safety Alert 70 — Mechanics: Prevent carbon monoxide poisoning