
Exhaust fitment compatibility is whether a specific muffler, pipe, or full system will physically and legally connect to your vehicle without unsafe modification. Before you order anything, you need to verify six things: your VIN and engine code, year/make/model/trim, inlet and outlet outside diameters (OD), hanger bracket positions, oxygen sensor bung locations, and your emissions package. Miss one of those, and you’re looking at a return, a leak, or a check engine light on the first drive.
Your three-step quick action before buying:
- Measure the OD at every connection point on the part you’re replacing, using calipers for accuracy.
- Photograph the side profile, underside, rear exit, and each connection joint of the existing system.
- Confirm the application table entry matches your exact VIN, engine code, and trim level, not just the model year.
Not every aftermarket exhaust fits every car without significant custom work. That’s the core truth behind exhaust fitment compatibility, and the rest of this guide shows you how to get it right the first time.
Key Takeaways
Exhaust fitment compatibility requires matching OD measurements, hanger positions, sensor bung locations, and vehicle-specific application table entries before you order, not after.
| Point | Details |
|---|---|
| Direct-fit is the safer choice | Bolt-on parts match OEM routing, hangers, and sensor positions without cutting or welding. |
| OD measurement is non-negotiable | Measure outside diameter at every connection point with calipers; never rely on nominal marketing specs. |
| Application table notes matter | Check engine code, trim, and emissions notes in every row, not just the model year column. |
| Sensor placement affects legality | Confirm bung count and position match your car’s O2 sensor layout before ordering. |
| Valvecontrolexhaust for complex installs | Specialist fitment support for luxury and performance vehicles covers VIN verification, hardware confirmation, and installer referral. |
Table of Contents
- What is exhaust fitment compatibility, and why does it matter?
- Direct-fit vs. universal-fit: which one do you actually need?
- How to measure your exhaust for a correct fit
- How to verify fitment before you place the order
- Common fitment mistakes and how to fix them
- Slip-on vs. full system: choosing the right scope
- How to read manufacturer application tables
- Emissions, oxygen sensors, and what’s legal
- An installer’s perspective on borderline fitment
- Valvecontrolexhaust makes complex fitment straightforward
- Sources
What is exhaust fitment compatibility, and why does it matter?
Exhaust fitment compatibility covers whether a part’s geometry, connection type, sensor provisions, and mounting hardware match your vehicle’s specific configuration. Two cars from the same manufacturer, same model year, can have completely different exhaust routing if one has an AWD drivetrain, a different engine variant, or a California emissions package. The part number that fits your neighbor’s car may not fit yours even if the cars look identical from the outside.
The practical stakes: a mismatched part either won’t bolt up at all, will leak at the flange, will sag because the hangers don’t align, or will throw a P0420 or O2 sensor code because the sensor bung is in the wrong position. Any of those outcomes costs time and money that a five-minute pre-order check would have prevented.
Direct-fit vs. universal-fit: which one do you actually need?
Direct-fit parts (also called bolt-on) are engineered for a specific year, make, model, engine, and sometimes trim. They replicate the OEM routing, hanger positions, flange patterns, and sensor bung locations. Bolt-on fitment means replacing the stock unit without cutting or welding. If the listing calls out your exact trim and engine code, that’s the signal you want.
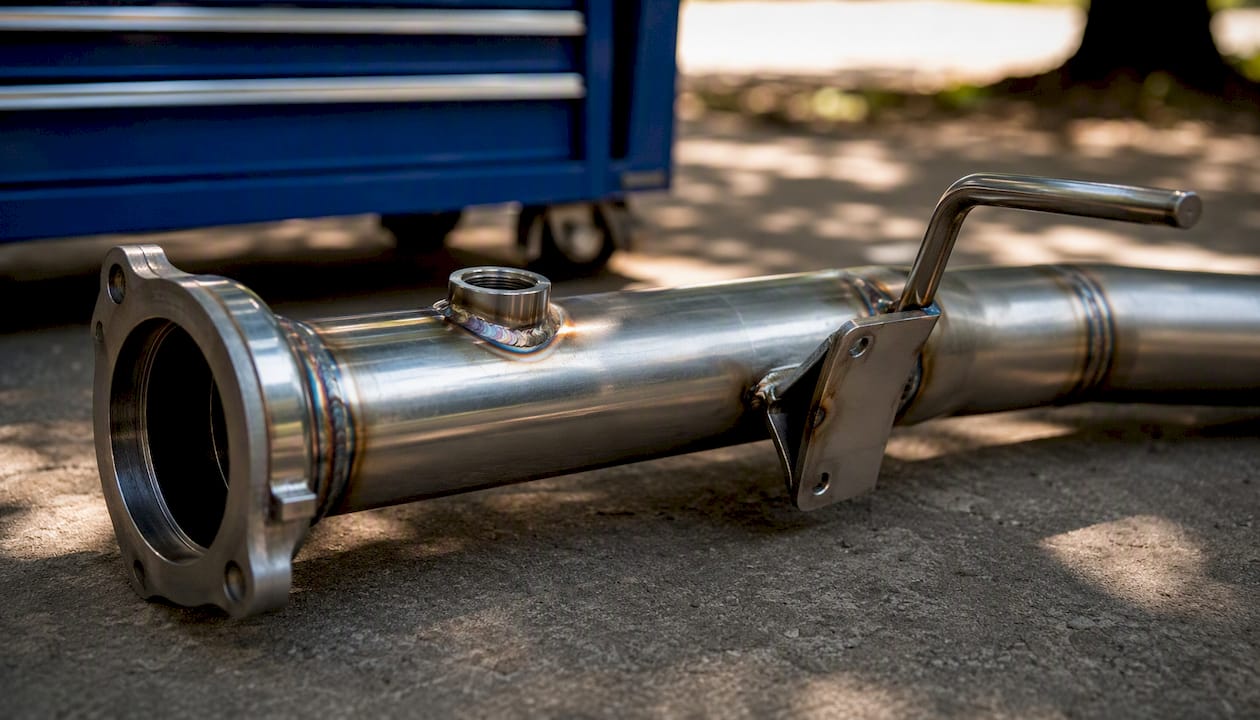
Universal-fit parts are built to a standard diameter and shape but require fabrication to install: cutting, welding, or adding reducers and adapters to bridge the gap between the part’s dimensions and your car’s connection points. Hanger positions won’t match. Flanges may not exist. Sensor bungs may be absent entirely.
| Evaluation factor | Direct-fit | Universal-fit |
|---|---|---|
| Fit precision | Matches OEM routing and hangers | Requires fabrication or adapters |
| Tools required | Basic hand tools | Welder, grinder, pipe cutter |
| Installation time | 1–3 hours typical | Half a day or more |
| Sensor provisions | Bungs pre-positioned | Often absent; must be added |
| Best for | Street cars, daily drivers, warranty-conscious builds | Custom builds, race cars, budget fabrication projects |
| Cost of errors | Low (part swaps cleanly or doesn’t) | High (fabrication time is expensive) |
Key differences beyond the table: direct-fit parts include vehicle-specific hanger brackets and gaskets; universal parts ship with none of that. Flange patterns on direct-fit units match the OEM stub, while universal parts typically use slip-fit (lap) joints that need clamps and sealant.
Pro Tip: Universal is acceptable when you have the OD measurements, a fabrication plan, and access to a welder. Avoid universal if you’re doing a street build on a car with tight chassis clearance or active emissions equipment. The savings rarely cover the labor.
You can also read why exhaust fitment differs by model for a deeper look at how trim and engine variants change routing and hanger geometry.
How to measure your exhaust for a correct fit
Exhaust parts are sized to mate at their connection points, and outside diameter at those points is the primary compatibility measurement. Nominal marketing diameters (“2.5-inch cat-back”) are often rounded and don’t account for wall thickness. Always measure the actual part you’re removing.
What to measure:
- Outside diameter at the inlet connection (where the new part meets the existing pipe)
- Outside diameter at the outlet connection (tip or next section)
- Body length from flange face to flange face, or from inlet center to outlet center
- Stub length on slip-fit joints (how far the pipe slides in)
- Centerline bend radius at major bends (affects chassis clearance)
- Hanger bracket position: distance from inlet flange to each hanger hook, and the bracket angle
Connection types to identify:
- Slip-fit (lap joint): one pipe slides inside the other; secured with a clamp. Measure OD of the inner pipe and ID of the outer.
- Welded flange: a flat plate with bolt holes; match the bolt pattern and gasket face diameter.
- Sleeve/clamped: a sleeve bridges two pipes; measure both pipe ODs and the sleeve length.
Step-by-step measurement checklist:
- Remove the part or access it on a lift with the car cold.
- Use calipers to measure OD at the inlet connection point. Record in millimeters.
- Measure OD at the outlet. Record.
- Measure body length along the centerline, not the outside curve.
- Locate each hanger hook and measure its distance from the inlet flange face.
- Note the hanger bracket angle (vertical, horizontal, or angled).
- Identify and photograph every sensor bung: location, thread size (typically 18mm x 1.5), and whether it’s upstream or downstream of any catalytic converter.
Photographs to take:
- Side profile of the full part showing the bend pattern
- Underside shot showing hanger bracket positions
- Rear exit showing tip angle and diameter
- Close-up of each connection joint showing the joint type
Measure the existing part where it connects (outside diameter) rather than relying on nominal marketing diameters. Photos help vendors confirm the exact joint type and catch fitment issues before shipping. A caliper reading at the connection point is worth more than any spec sheet.
For standard diameter references, the exhaust tip diameter size guide covers common OD standards across vehicle categories.
How to verify fitment before you place the order
Confirming vehicle year, make, model, engine, and emissions package before ordering is the single step that prevents most wrong-part purchases. Run this workflow every time.
- Gather your VIN and engine code. The VIN decodes your exact production build: engine variant, transmission, emissions package, and market. Your engine code (stamped on the block or listed in the owner’s manual) confirms which exhaust routing your car left the factory with.
- Identify the system section. Determine whether you need a cat-back, axle-back, mid-pipe, downpipe, or full system. Ordering the wrong section is the most common mistake.
- Compare your measurements to the part spec. Inlet OD, outlet OD, body length, and hanger positions must all match within a few millimeters.
- Check the application table. Find your exact year, engine code, and trim in the manufacturer’s fitment chart. Look for notes about AWD/2WD splits, California emissions, or trim exclusions.
- Contact the seller with your photos and measurements. Send your four photographs and your measurement log. Ask specifically: What is the inlet OD? Are oxygen sensor bungs included and pre-positioned? What gaskets and clamps are in the box? What is the hanger hardware configuration?
- Confirm the returns policy. Even with perfect prep, confirm the seller accepts returns for fitment issues before you pay.
Vehicle-specific kits usually include the required hardware, so a listing that specifies exact trims and includes gaskets, clamps, and hanger brackets is a strong signal of true bolt-on design.
For manifold and downpipe connections, exhaust manifold gaskets are a common included-hardware item worth confirming before ordering.
Pro Tip: Keep a small measurement log: a note on your phone with inlet OD, outlet OD, body length, and hanger distances. Paste it into every seller inquiry. It cuts response time and gives the seller exactly what they need to confirm fit.
Common fitment mistakes and how to fix them
Most fitment problems trace back to one of five root causes. Recognizing the symptom early saves you from a full reinstall.
Common mistakes and their symptoms:
- Wrong system section (e.g., ordering cat-back when you need axle-back): part arrives with the wrong inlet position or an extra section you can’t connect.
- Diameter mismatch: the new pipe won’t slide onto the existing stub, or slides too far and won’t clamp securely.
- Missing or misaligned hangers: muffler sags, contacts the heat shield or chassis, and rattles at idle.
- Sensor bung absent or wrong position: check engine light appears immediately after install; O2 sensor reads incorrectly.
- Flange pattern mismatch: bolt holes don’t align; you can’t torque the joint without stressing the pipe.
| Situation | Likely cause | Recommended fix |
|---|---|---|
| Exhaust sags or contacts chassis | Hanger positions don’t match OEM | Add universal hanger bushings or fabricate a bracket to the correct position |
| Leak at flange joint | Gasket missing or flange pattern mismatch | Replace gasket; if bolt pattern differs, use a flange adapter or return the part |
| Check engine light (O2 code) | Sensor bung absent, wrong thread, or wrong position | Have a bung welded in the correct location by a fabricator |
| Pipe won’t connect | OD mismatch at slip-fit joint | Use a step reducer or return for correct-diameter part |
| Rattle at idle | Hanger rubber worn or bracket angle wrong | Replace hanger rubber; adjust bracket angle with a spacer |
OEM and aftermarket systems vary in flange types, hanger designs, and routing, and chassis clearance is one of the most common root causes of fitment failure after installation. When a problem involves incorrect routing that contacts the chassis or heat shield, that’s a professional rework situation, not a DIY fix with a clamp. If the pipe needs to be re-bent or a bung needs to be welded, a shop with a pipe bender and MIG welder will do it right the first time.
For post-install issues specific to valved systems, the valve control exhaust troubleshooting guide covers the most common electronic and mechanical issues.
Slip-on vs. full system: choosing the right scope
The scope of your exhaust project determines how complex the fitment process gets.
Slip-on (muffler replacement or axle-back):
- Replaces only the rear section; connects at an existing mid-pipe slip-fit joint.
- Lowest fitment complexity: match the inlet OD, hanger positions, and tip angle.
- No fueling or sensor changes required in most cases.
- Best for: sound and appearance upgrades with minimal installation risk.
Full system (cat-back, header-back, or turbo-back):
- Replaces everything from the manifold or downpipe back.
- Requires matching every section’s diameter, all hanger positions, and all sensor bung locations.
- Affects flow and fueling, so engine management attention is often needed.
- Best for: measurable performance gains where you’re also planning a tune.
When to plan a tune:
- Any system that removes or relocates a catalytic converter.
- Headers or downpipes that change exhaust gas velocity significantly.
- Any build where the O2 sensor reads differently post-install and the ECU can’t self-correct.
- Forced-induction cars where back-pressure changes affect boost response.
Full systems on performance cars with active engine management (BMW, Porsche, Ferrari, Lamborghini) almost always need professional installation. The routing is tighter, the sensor count is higher, and the ECU calibration is more sensitive to exhaust changes.
How to read manufacturer application tables
Application tables are the most reliable fitment tool available, but only if you know which columns to trust and which notes to take seriously.
Common table columns and what they mean:
- Make/Model/Year: the baseline filter. Multi-year ranges (“2018–2023”) are common but need scrutiny.
- Engine code: the most important column for performance cars. Two cars with the same model name but different engine codes often have different exhaust routing.
- Trim: AWD vs. 2WD, Sport vs. base, often determines hanger position and pipe diameter.
- Part number: the specific SKU. Confirm this matches what’s in your cart.
- Notes: the column most buyers skip. This is where you find “California emissions excluded,” “does not fit Sport package,” or “requires OEM mid-pipe.”
- Included hardware: gaskets, clamps, hangers. If it’s blank, ask.
Performance manufacturers like Tomei publish detailed application tables with engine code splits and emissions notes. Reading a row correctly means checking every column, not just the model year.
Red flags in application tables:
- Vague multi-year ranges with no engine code column.
- “Fits most” language with no trim exclusions listed.
- No notes column at all.
- Part numbers that don’t appear on the manufacturer’s own website.
Vague multi-year fitment claims are a red flag; a listing that calls out your exact trim and engine code is the one worth trusting. When a table row matches your VIN decode perfectly and the notes column is clean, you’re in good shape. When it doesn’t, contact the seller before ordering.
| Table signal | What it means | Your action |
|---|---|---|
| Exact engine code listed | Part engineered for your specific variant | Proceed with measurement confirmation |
| Multi-year range, no engine code | Fitment may be approximate | Ask seller for engine-code-specific confirmation |
| “California emissions excluded” note | Part removes or bypasses CARB-compliant equipment | Check your state’s rules before ordering |
| Included hardware listed | True bolt-on design | Confirm hardware matches your connection type |
Emissions, oxygen sensors, and what’s legal
Oxygen sensor placement is a fitment issue, not just an emissions issue. Move a sensor to the wrong position and the ECU reads incorrect exhaust gas data, which triggers codes and can cause the engine to run rich or lean.
What to check before buying:
- How many O2 sensors does your car have, and where are they positioned relative to the catalytic converter?
- Does the new part include pre-welded sensor bungs in the correct locations?
- If the part relocates a catalytic converter, does it maintain the same upstream/downstream sensor relationship?
- Is the bung thread size compatible with your sensor (18mm x 1.5 is standard on most applications)?
Removing or defeating emissions equipment is illegal under federal law in the United States, and some states (California being the most prominent) have additional regulations enforced through CARB. A part that deletes a catalytic converter or blocks an O2 sensor may pass a visual inspection in one state and fail in another.
Any exhaust modification that removes, relocates, or renders inoperative emissions control equipment may violate federal and state law. Before ordering a part that changes catalytic converter position or eliminates sensor bungs, confirm your state’s vehicle modification rules and whether the part carries an Executive Order (EO) number for your market.
What to document when ordering:
- Confirm the part number includes all required sensor bungs for your car’s sensor count.
- Ask whether the part is 50-state legal or California-emissions excluded.
- Keep a record of the part number, seller confirmation, and any EO number in case of an inspection.
An installer’s perspective on borderline fitment
The cases that trip up even experienced buyers aren’t the obvious mismatches. They’re the one-inch inlet offset on a part that otherwise looks perfect, the hanger bracket that’s angled five degrees differently from OEM and causes the muffler to contact the heat shield under load, or the sensor bung that’s positioned correctly but threaded to a non-standard pitch.
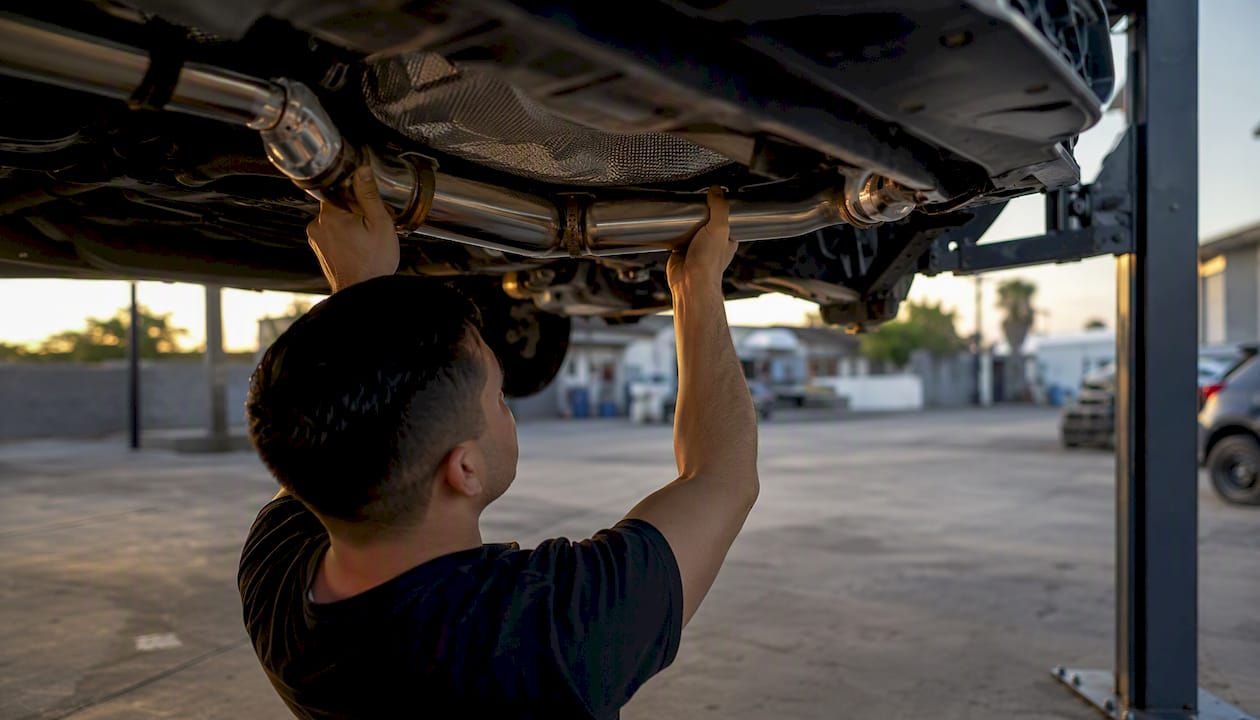
Before final assembly, experienced installers dry-fit every section with the car on a lift and all hangers loose. That means hanging the full system without tightening anything, then checking clearance at every chassis contact point through the full range of suspension travel. Only after that check do they torque the flanges and set the hangers.
Pro Tip: Before tightening any clamp or flange bolt, push the system toward the chassis at its tightest clearance point. If it contacts anything with hand pressure, it will contact it under road vibration. Adjust hanger position or add a spacer before you call the install done.
When the stock section is in good condition and the fitment on an aftermarket part is borderline, keeping the OEM piece is often the smarter call. The upgrade is only worth the risk when the fitment is confirmed clean and the performance or sound benefit is clear. For luxury performance cars where routing is tight and sensor count is high, specialist fitting removes the guesswork entirely.
Valvecontrolexhaust makes complex fitment straightforward
For Audi, BMW, Ferrari, Lamborghini, Porsche, and Mercedes-AMG owners, exhaust fitment isn’t a generic bolt-on exercise. These cars have tight chassis clearances, multiple O2 sensors, active valve systems, and ECUs that respond to exhaust changes. Getting the part right the first time requires more than a model-year lookup.

Valvecontrolexhaust specializes in valved exhaust systems for exactly these vehicles, with fitment support that covers VIN verification, photo review, hardware confirmation, and referral to specialist installers who know the routing on each platform. Every system ships with the hardware your car needs, and the compatibility check happens before the order ships, not after. For readers weighing high-end aftermarket systems, the fitment expertise that comes with a specialist supplier is part of what you’re paying for. Start your order or fitment inquiry at Valvecontrolexhaust.
Sources
The following resources are worth bookmarking for fitment research and verification:
- Motorcycle Exhaust Guide: Fitment, Sound, DB Killers and Upgrades
- Can Any Exhaust Fit Any Car? Compatibility Truths
- Exhaust Parts Sizing
- What Does Bolt-On Fitment Actually Mean? A Guide for SxS Exhaust Buyers | GGB
- Carparts
- How to Choose & Install Aftermarket Exhaust Parts: SAMExhaust Expert G – samexhaust