
Most CELs after a downpipe install come from the downstream O2 sensor detecting a change in catalyst efficiency, triggering a P0420-style code. The fix depends on what’s causing it. Pull the code with an OBD2 scanner before you do anything else. Clearing it without a diagnosis just delays the same light coming back, and your permanent options come down to a catted downpipe with a higher cell count, a proper tune, or in some cases a spacer as a stopgap.
TL;DR:
- Most CELs after a downpipe install relate to downstream O2 sensors detecting catalyst efficiency issues, often triggered by hardware changes or ECU monitoring cycles.
- Diagnosing these codes requires checking freeze-frame data, live O2 sensor signals, and inspecting sensor positioning and wiring, not just clearing the code.
- Using spacers or piggyback devices may temporarily silence the CEL but do not address underlying catalyst or sensor problems, especially on daily drivers in states with strict emissions tests.
- A proper tune can disable or recalibrate the downstream monitor to prevent false codes on catless or high-flow setups, but hardware choices like higher-cell catted downpipes often provide more reliable long-term results.
- Ensuring fitment compatibility and understanding your local emissions laws help avoid unnecessary costs and the risk of failing inspections due to incorrect hardware or unverified modifications.
Table of Contents
- What Happens to Exhaust Monitoring After a Downpipe Swap
- How to Diagnose a CEL After Downpipe Installation
- Do O2 Spacers and Piggyback Tunes Actually Fix It?
- Tune or Hardware Swap: Which One Actually Solves It
- Emissions Rules and Inspection Risk You Should Know
- What Fixing This Actually Costs and How Long It Takes
- How Valve Control Exhaust Reduces CEL Risk From the Start
- Your Next Steps After a CEL Appears
- What the Data Actually Tells Us About Downpipe CELs
- Get Fitment-Checked Hardware Instead of Guessing Twice
- Sources
What Happens to Exhaust Monitoring After a Downpipe Swap
Your engine has two oxygen sensors bracketing the catalytic converter for a reason. The upstream sensor, mounted before the cat, measures raw exhaust gas and helps the ECU manage fuel trims in real time. The downstream sensor sits after the cat and does something different: it watches how much the catalyst is scrubbing the exhaust stream. A healthy catalyst produces a slow, damped signal downstream compared to the choppier upstream reading. When both sensors start switching at a similar rate, the ECU concludes the catalyst isn’t doing its job and sets an efficiency code, usually P0420 or P0430 depending on bank.
That’s exactly what a downpipe changes. A catless downpipe removes the catalyst entirely, so the downstream sensor sees nearly the same gas composition as the upstream one almost immediately. A catted downpipe with a smaller, high-flow cat, often built with a 200-cell substrate instead of the OEM 400-cell unit, still filters exhaust, but less aggressively. It can pass on some cars and trip the same code on others, depending on how tightly the manufacturer set the efficiency threshold.
Here’s the part that trips people up: the CEL doesn’t always appear on day one. Catalyst-efficiency monitoring runs as part of the ECU’s onboard diagnostic self-test cycle, which only completes under specific driving conditions, steady highway speeds, particular engine temperatures, a certain number of drive cycles. Some owners drive a week or two with no light at all, then it pops on out of nowhere during a routine commute. That delay isn’t a good sign that you dodged the problem. It usually just means the monitor hasn’t run its full test yet.
Reddit threads on installs like the IE downpipe on VW/Audi platforms show this pattern constantly: CEL shows up anywhere from a few days to a few weeks after the install, almost always tracing back to the same downstream monitor. If you’re mainly chasing sound rather than serious power, a cat-back exhaust carries a much lower CEL risk than a downpipe, since it doesn’t touch anything upstream of the catalytic converter that the ECU is watching.
How to Diagnose a CEL After Downpipe Installation
Guessing wastes money. A structured diagnostic pass tells you in under an hour whether you’re dealing with a sensor problem, a genuine catalyst-efficiency mismatch, or something mechanical that has nothing to do with the downpipe itself.
- Read and log the codes. Plug in an OBD2 scanner and write down every code, not just the first one. Also pull the freeze-frame data attached to the CEL. It records the exact RPM, load, coolant temperature, and fuel trim values at the moment the fault triggered, which narrows down whether the issue is load related or a cold-start quirk.
- Capture live O2 sensor data. This is the step most people skip and shouldn’t. Watch upstream and downstream O2 voltage traces side by side while driving. A properly functioning system shows the downstream sensor moving slowly and staying relatively flat, while the upstream sensor swings quickly. If both traces mirror each other, that’s your catalyst-efficiency mismatch confirmed in real time, not guessed at from a code number.
- Inspect the hardware visually. Get under the car and look at the sensor bungs, the welded fittings that hold the O2 sensors in place. Aftermarket downpipes sometimes use bungs at a slightly different angle or depth than OEM, and a sensor that isn’t fully seated reads garbage data. Check for exhaust leaks near the flange, which throw off O2 readings by leaking outside air into the exhaust stream, and check the wiring harness for chafing where it may not have been rerouted properly during install.
- Interpret the pattern. A code that returns instantly after clearing, paired with mismatched O2 traces, points to a genuine catalyst-efficiency issue tied to the downpipe itself. A code paired with an erratic or dead sensor voltage (stuck near 0V or 5V) usually means a damaged or unseated sensor, not a catalyst problem. A lean code (P0171/P0174) alongside the efficiency code often signals a boost leak or tune mismatch rather than anything downpipe-specific.
This diagnostic approach mirrors the same ECU logic and workflow used across other emissions-hardware modifications: read the code, log freeze-frame conditions, then verify with live sensor data before assuming you know the cause. Skipping straight to a fix without this step is how people buy parts they didn’t need.
Do O2 Spacers and Piggyback Tunes Actually Fix It?
They can quiet the light down, but you need to know what you’re actually doing when you use them.
An O2 spacer, sometimes called a defouler, is a small-threaded extension that moves the downstream sensor slightly out of the direct exhaust stream. With less raw exhaust hitting the sensor tip, its voltage swings become slower and more damped, closer to what the ECU expects from a working catalyst. It can work. It also frequently doesn’t, and even when it does, it’s addressing what the sensor sees, not the exhaust itself. Owners on the Ford Focus RS forum report mixed results with spacers, some solve the code outright, others need trial and error with spacer length before the readings settle enough to stop tripping the threshold.
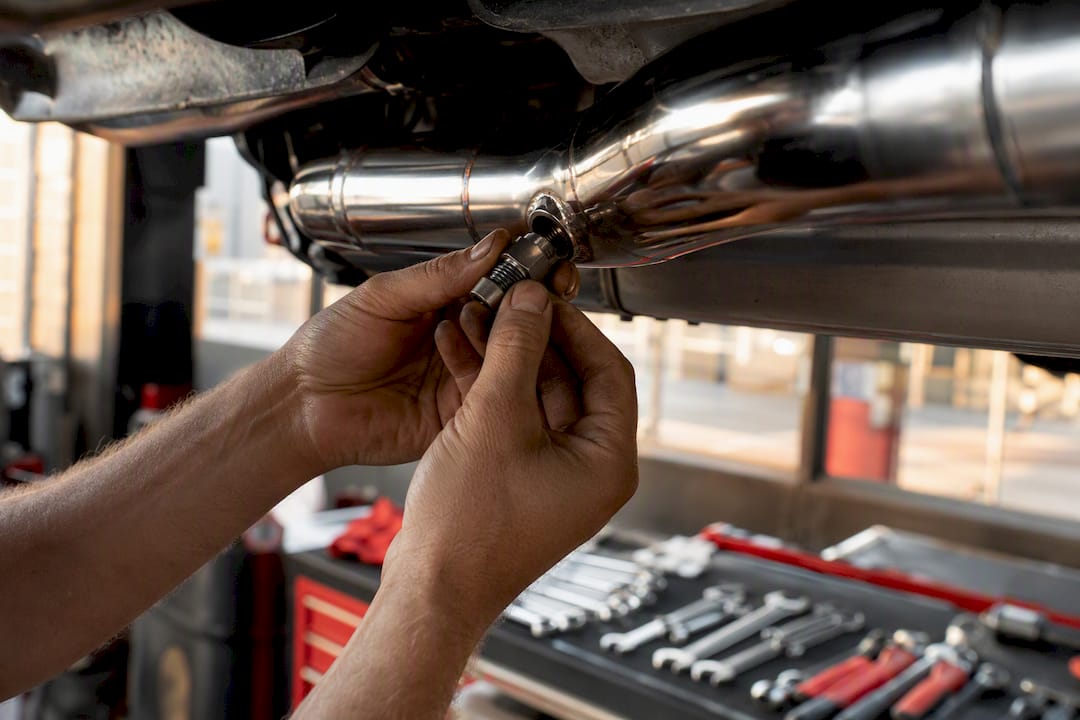
Piggyback devices and standalone code-clearing tools work differently. They either intercept the sensor signal before it reaches the ECU or simply erase the stored fault after it sets. Neither approach touches the actual catalyst efficiency. Threads discussing JB4 and similar devices on turbocharged platforms show the same theme repeating: the code often comes back within a drive cycle or two, and some owners report drivability hiccups when the piggyback’s fuel or timing adjustments don’t quite match what the ECU expects elsewhere.
Where these tools make sense:
- Track-only cars that never see a public road or emissions test
- States with no periodic emissions inspection where a lit CEL is purely cosmetic
- Temporary troubleshooting to confirm your diagnosis before committing to a permanent fix
Where they don’t:
- Daily drivers registered in states with OBD2 emissions testing
- Anyone chasing a warranty claim or dealership visit, where a masked code can complicate diagnosis later
- Situations where the underlying issue is a boost leak, damaged sensor, or vacuum leak, none of which a spacer or piggyback resolves
Pro Tip: Before you buy a spacer, run the live O2 trace test from the diagnostic section above. If the downstream sensor is dead or unseated rather than just reading “too clean,” a spacer won’t fix a wiring problem no matter how it’s positioned.
Tune or Hardware Swap: Which One Actually Solves It
A tune rewrites how the ECU interprets sensor data and fuel delivery. For catless downpipes especially, this usually means disabling or recalibrating the downstream catalyst-efficiency monitor so it stops comparing readings against a catalyst that no longer exists. Tuners routinely recommend this step for catless setups and aggressive Stage 2 builds, and skipping it doesn’t just risk a CEL. On some platforms, the ECU pulls timing or drops into limp mode when it sees persistent sensor mismatches, which costs you more performance than the downpipe gained.
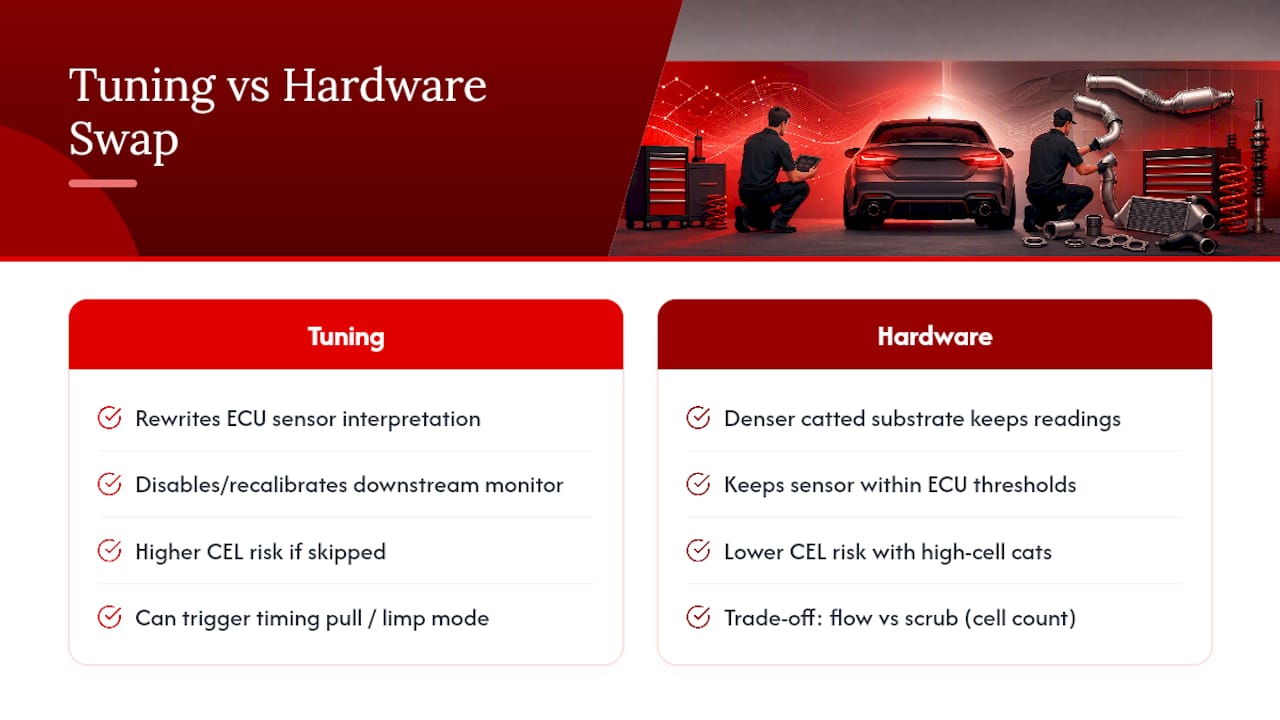
Hardware tells a different story. A catted downpipe with a denser substrate, closer to OEM cell counts, filters exhaust more thoroughly and keeps the downstream sensor reading in a range the ECU accepts without any tune at all. The trade-off is cell count versus flow: a 200-cell cat flows better and sounds more aggressive than a stock 400-cell unit, but it scrubs less exhaust, which means it’s still more likely to trip an efficiency threshold on some vehicles than a higher-cell option. If your goal is sound and modest gains without touching the tune, a higher-cell catted downpipe built for your specific platform is usually the more reliable path than fighting a catless setup with software workarounds.
Dyno-based professional tuning beats piggyback clearing for one simple reason: a dyno tune maps fueling, timing, and sensor logic against real load data specific to your car, not a generic preset. That’s the difference between a fix that holds up over thousands of miles and one that papers over the symptom for a few drive cycles before the code resurfaces.
If you’re not ready to commit to a tune and don’t want to gamble on cell count, reverting to OEM hardware remains the most predictable way to guarantee the light stays off, particularly on vehicles you plan to keep long term or trade in.
Emissions Rules and Inspection Risk You Should Know
Modifying anything upstream of or including the catalytic converter can affect whether your car passes a state emissions inspection. Rules vary significantly. Some states test tailpipe emissions directly, some read OBD2 monitor status, and some don’t inspect at all. None of that changes based on what fix you chose for the CEL.
This matters because spacers and tunes don’t alter your car’s legal emissions status, they only change what the ECU reports. A spacer that stops the light from illuminating doesn’t mean the catalyst is actually filtering exhaust to the standard your state expects. A tune that disables the downstream monitor doesn’t make a catless downpipe legal in states that check for catalyst presence. You’re managing a dashboard light, not resolving the underlying compliance question.
If your car is a daily driver registered somewhere with emissions testing, prioritize compliant hardware, a catted downpipe that meets your state’s requirements, over software fixes. It’s the only route that doesn’t put your registration at risk every renewal cycle. If your build is track-only, trailered, or registered in a state with no periodic testing, you have more room to make trade-offs based on sound and power alone. Know which category you’re in before you pick a fix, because the right answer genuinely differs between the two.
What Fixing This Actually Costs and How Long It Takes
Costs vary by platform and labor rates, but the general ranges hold across most makes.
- O2 sensor replacement: Parts typically run $50 to $200 depending on the vehicle, plus an hour or less of labor if the bung isn’t seized.
- O2 spacers/defoulers: Usually under $30 for the part itself, installed in minutes with basic hand tools.
- Basic piggyback tune or map: Often $200 to $600 depending on the device and platform.
- Professional dyno tune: Commonly $400 to $1,000+, varying by shop and how much custom mapping the platform needs.
- Swap to a higher-cell catted downpipe: Parts plus labor often land between $500 and $1,500+, more on exotic or luxury platforms where fitment is tighter and fabrication work is common.
Timeline-wise, a sensor swap or spacer install is usually a same-day job, sometimes done in under an hour. Tuning and dyno sessions typically take one to three days depending on shop scheduling and how much back-and-forth the calibration needs. Costs climb fast when a downstream sensor has seized in a rusted OEM bung and needs heat or extraction tools, when custom fabrication is required to fit a downpipe on a platform it wasn’t originally designed for, or when a botched piggyback tune sends the car back to the shop for a second round of diagnostics.
How Valve Control Exhaust Reduces CEL Risk From the Start
Fitment is where most CEL problems actually start, not the downpipe itself. Valvecontrolexhaust builds compatibility checks into every downpipe listing, matched to specific chassis codes and model years, precisely because a downpipe designed for the wrong generation of a platform is the fastest way to end up with a misaligned sensor bung or an ill-fitting flange that leaks exhaust past the O2 sensor.
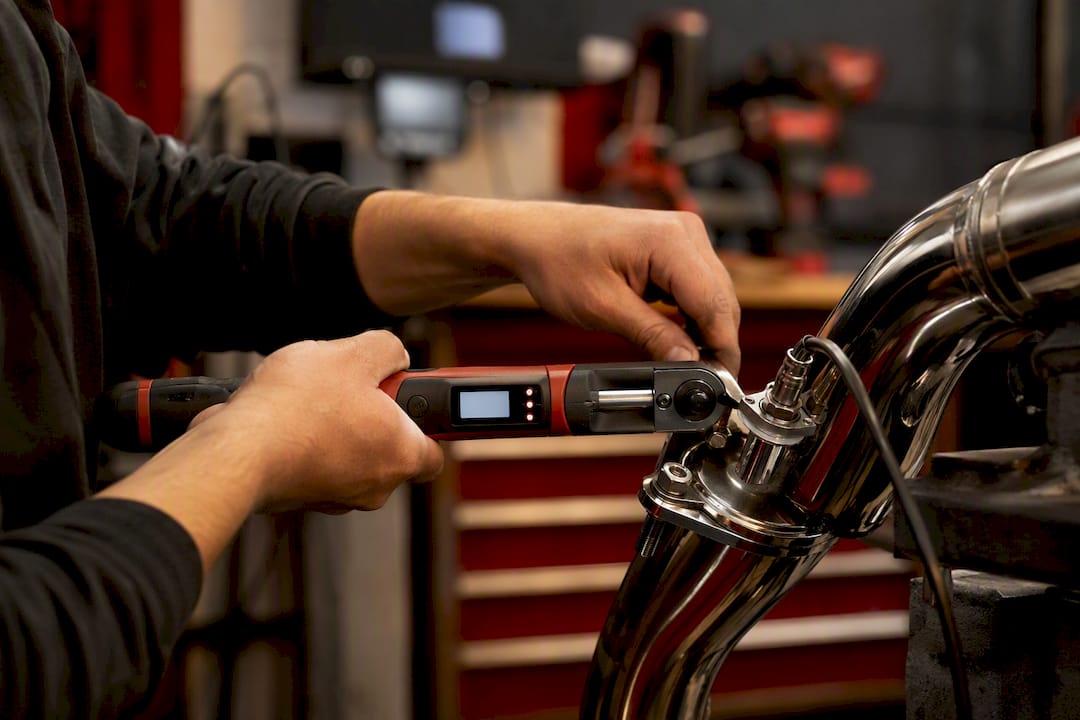
The installation checklist Valvecontrolexhaust recommends starts before the new part ever goes on the car. Inspect the existing O2 sensors for wear or contamination before removal, since a sensor that was already degrading under OEM hardware won’t perform better under a modified one. Replace corroded or damaged bungs rather than forcing an old sensor into a new fitting, and insist on professional welding and fitment rather than a rushed home install, especially on platforms where the downpipe sits close to heat shields or wiring runs that can chafe over time.
For catless setups, Valvecontrolexhaust’s fitment guidance leans toward pairing the part with a proper tune rather than relying on ECU workarounds. For owners who want a simpler path, a 200-cell catted downpipe built for platforms like the BMW 535i often gets you meaningful flow gains without requiring a tune at all, which is the more practical choice for most daily-driven builds.
Common fitment issues, from sensor bung mismatches to CEL patterns tied to specific platforms, get covered in more depth in Valvecontrolexhaust’s troubleshooting resource, built from recurring questions the brand fields directly from installers and customers working through the same diagnostic steps outlined above.
Your Next Steps After a CEL Appears
Work through this in order rather than jumping straight to a fix.
- Read and record every code, including freeze-frame data, before you touch anything. Photograph the sensor bungs and wiring near the downpipe while you’re under the car.
- Capture live O2 data, either with your own scan tool or by bringing the car to a shop equipped to log upstream and downstream traces during a drive.
- Match your evidence to a decision. Mismatched O2 traces with no wiring or sensor damage points toward a catalyst-efficiency issue best solved with a tune or a higher-cell catted downpipe. A damaged or unseated sensor points toward a hardware fix, not a tune. A code that clears and stays clear after a drive cycle with no intervention was likely a fluke from the initial self-test.
- Ask the right questions before you commit money. If you’re calling a tuner, ask specifically whether they’ve mapped your exact downpipe and platform combination before, not just similar cars. If you’re reaching out to Valvecontrolexhaust for a fitment check, have your VIN, current downpipe part number, and the exact codes you pulled ready, it speeds up getting an accurate recommendation instead of a generic one.
What the Data Actually Tells Us About Downpipe CELs
The conventional wisdom treats a CEL after a downpipe install like a nuisance to be silenced. That framing gets the priority backwards. The light is diagnostic information, and the community reports and technical workflows covered here point to the same conclusion: owners who read the code and check live sensor data before reaching for a spacer or piggyback consistently spend less money and avoid repeat visits compared to owners who clear the code first and diagnose later.
The overrated fix, hands down, is the standalone piggyback device marketed as a CEL cure. It treats a symptom the ECU will keep re-detecting every few drive cycles. The underrated fix is matching cell count to your actual driving pattern before you even buy a downpipe. A daily driver in a testing state has no business running catless, and a track car has no business paying for a dyno tune it’ll use twice a year. Match the hardware to how the car actually gets driven, then diagnose before you spend another dollar chasing the light.
— Info
Get Fitment-Checked Hardware Instead of Guessing Twice
Buying a downpipe blind and troubleshooting the CEL afterward costs more in wasted parts and shop visits than getting fitment right the first time. Valvecontrolexhaust builds compatibility data into every listing by chassis and model year, so you’re not left guessing whether a catted or catless option fits your car’s sensor placement and inspection requirements.

If you’re deciding between a higher-cell catted downpipe and a full tune, start by browsing compatible catted options for your platform or requesting a fitment check before you order anything. For daily-driven cars where CEL risk and long-term reliability matter more than shaving off the last few horsepower, the daily driver exhaust customization guide walks through which hardware choices keep your inspection status clean. Reach out with your VIN and current codes, and Valvecontrolexhaust can point you toward the specific downpipe and tuning combination that fits your car instead of a generic recommendation.
Sources
For deeper technical background, the ECU logic and diagnostic workflow guide covers sensor interpretation in more detail. Browse compatible catted downpipes or the troubleshooting resource for platform-specific fitment guidance.
- What Is a Downpipe? Turbo Benefits, HP Gains, Sound & Legal Risks
- BMW Downpipes: Power Gains, CEL Risk, and What to Know Before You Buy | Bavarian Garage
- after catless downpipe install check engine light | Ford Focus RS Forum