For a luxury sports car, the best exhaust noise control setup combines adjustable valves, tuned Helmholtz resonators, and an ECU-mapped controller. That combination actively shapes sound across every RPM band, kills drone without restricting flow, and keeps throttle response exactly where it belongs. If you want the step-by-step install and calibration process, jump straight to the setup checklist below.
Table of Contents
- How does valve-based exhaust noise control actually work?
- What hardware do you actually need for the setup?
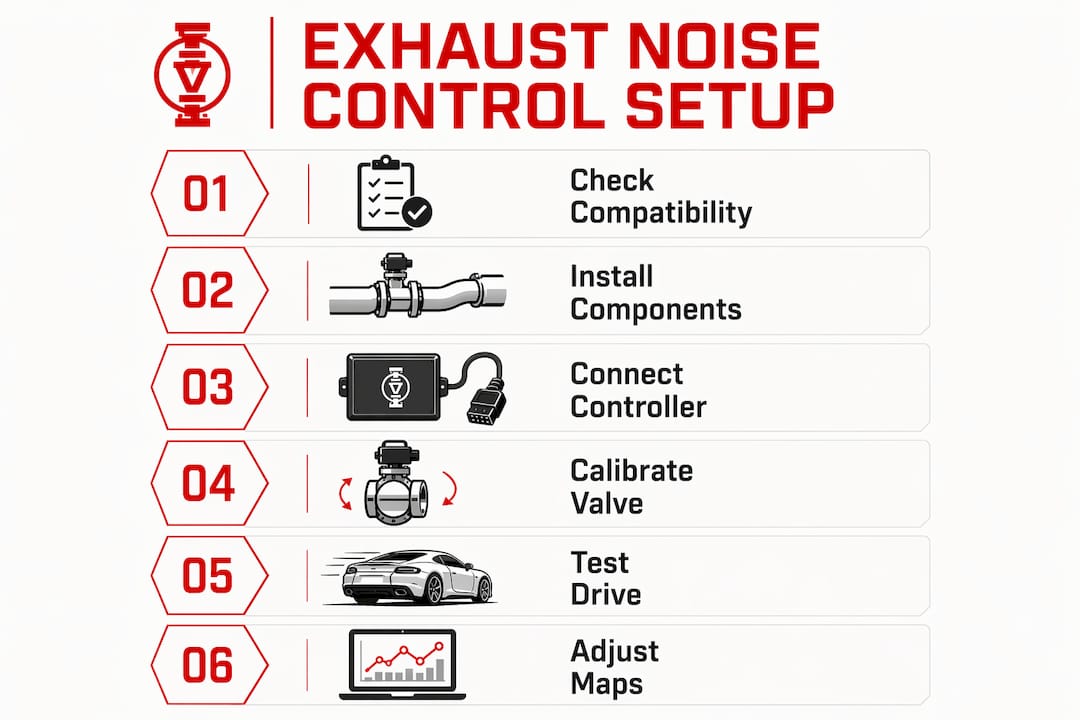
- Step-by-step installation and calibration checklist
- How do you tune out drone without hurting performance?
- What does a complete setup cost and how long does it take?
- U.S. street-legal and decibel compliance best practices
- How do you maintain a valve exhaust system for long-term reliability?
- Key Takeaways
- Why resonator tuning beats every shortcut
- Valvecontrolexhaust: where to start your build
- Useful sources and further reading
How does valve-based exhaust noise control actually work?
The core claim: a valve plus resonator plus controller map gives you active noise shaping with almost no backpressure penalty. That is the fundamental advantage over a restrictive muffler, which trades flow for silence.
Two acoustic mechanisms do the heavy lifting:
- Destructive interference: When sound waves traveling in opposite directions meet out of phase, they cancel. Chamber volumes and baffle layouts create impedance mismatches that reflect waves back into the pipe, canceling the incident wave at the target frequency.
- Helmholtz resonance: A cavity connected to the exhaust pipe by a short neck resonates at a specific frequency determined by cavity volume and neck geometry. At that frequency, the resonator absorbs acoustic energy from the flow with minimal restriction, which is why Helmholtz resonators are the first-line fix for low-frequency drone rather than heavy mufflers.
The full system has five layers: the adjustable valve (opens/closes to redirect flow and alter the acoustic path), a high-torque actuator (moves the valve on command), one or more resonator chambers (tuned to the drone frequency), a controller or ECU (holds the valve maps and reads RPM, throttle position, and optionally a cabin microphone), and the wiring harness that ties them together. Imagine the exhaust path as a Y: at low RPM the valve routes gas through the resonator branch, killing drone; at high RPM it opens the straight-through path for full scavenging. A hybrid reactive/dissipative design that pairs baffled resonators with absorptive packing delivers broadband attenuation while keeping backpressure low.
Pro Tip: Add a cabin microphone input to your controller if the platform supports it. Real-time SPL feedback lets the map self-correct for temperature and load changes that shift drone frequency by 20–40 Hz between cold starts and full operating temperature.
What hardware do you actually need for the setup?
| Component | Role | Fitment note |
|---|---|---|
| Adjustable valve (vacuum or electric) | Opens/closes to control flow path and acoustic routing | Must match pipe OD and flange pattern; verify clearance to heat shields |
| High-torque actuator | Drives valve travel; must resist exhaust heat | Size torque to valve diameter; undersized units stick at high backpressure |
| Helmholtz resonator chamber | Targets and absorbs the drone frequency | Compact bottle-neck geometries fit tight underfloor packaging on Audi, BMW, Ferrari, and Lamborghini platforms |
| CAN-enabled controller or ECU module | Holds valve maps; reads RPM, throttle, optional mic | CAN integration avoids separate wiring runs; CAN bus ANC systems use engine speed as the primary reference |
| Wiring harness and fuse block | Powers actuators and controller; protects circuits | Use heat-rated loom within 12 inches of the exhaust; 20A fuse minimum per actuator circuit |
| Sensors (RPM, throttle position, optional cabin mic) | Feed the controller map | RPM and TPS are usually available on OBD-II or CAN; cabin mic requires a separate analog input |
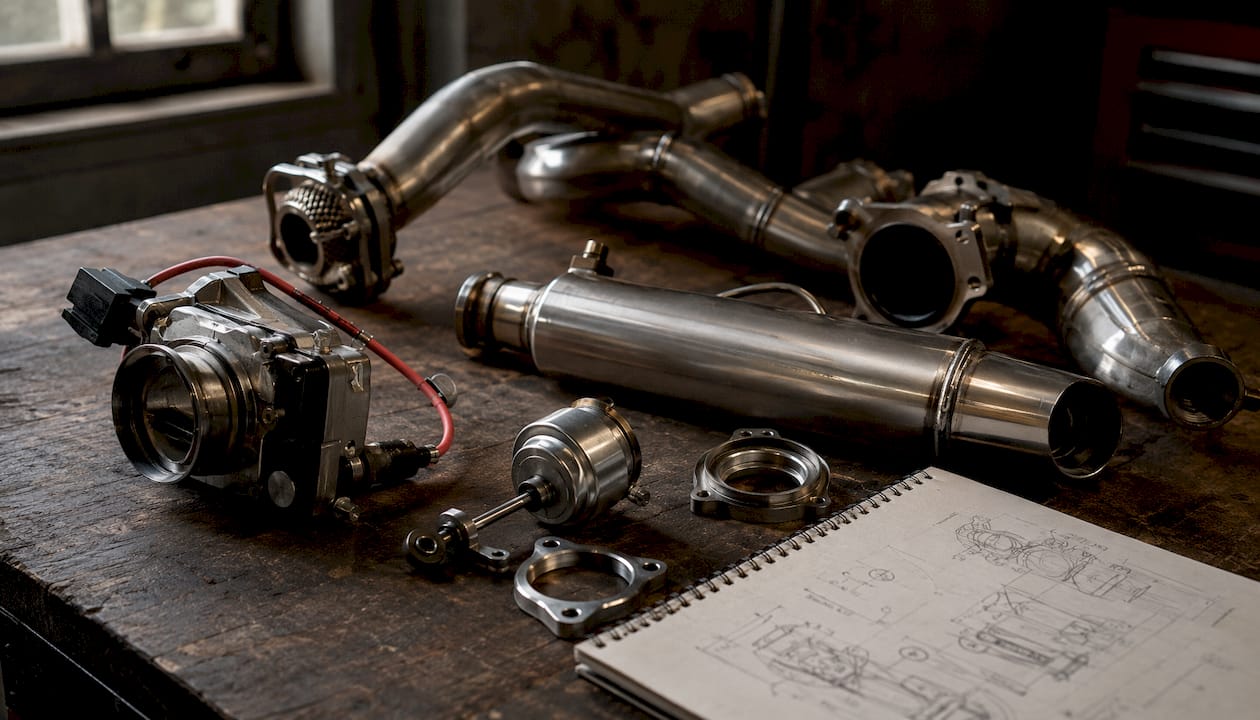
Compatibility is the first thing to verify before ordering. Luxury platforms vary significantly in flange patterns, pipe diameters (typically 2.5–3.5 inches on V8/V10/V12 applications), and underbody clearance near catalytic converters. Emissions components are non-negotiable: the valve must sit downstream of the catalytic converter on any street-driven car in the U.S. to avoid OBD-II fault codes. For exhaust customization on luxury models, a bolt-on kit is the cleanest path; partial fabrication (custom resonator canisters, adapter flanges) adds shop time but allows precise resonator sizing.
Pro Tip: Select an actuator rated for at least 25% more torque than the valve manufacturer’s minimum spec. Exhaust carbon deposits increase valve resistance over time, and an undersized actuator will start sticking within 12,000–18,000 miles.
Step-by-step installation and calibration checklist
- Fitment mockup. Dry-fit all components with the car on a lift before cutting or welding. Confirm resonator canister clears the subframe, heat shields, and driveshaft at full suspension droop.
- Emissions check. Verify the valve position is downstream of all catalytic converters. On California-registered vehicles, confirm CARB exemption status for the specific kit.
- Wiring: power and ground. Run a dedicated 12V feed from the fuse block with a 20A fuse per actuator. Ground to the chassis within 18 inches of the actuator, not to the exhaust pipe itself.
- CAN/OBD-II integration. Connect the controller to the vehicle CAN bus or OBD-II port for RPM and throttle-position signals. Confirm the controller reads stable RPM data at idle before proceeding.
- Actuator mounting. Bolt actuators to the valve body with heat-rated hardware. Set mechanical travel stops so the valve cannot over-rotate and bind against the pipe wall.
- Thermal protection. Wrap actuator wiring within 6 inches of the exhaust pipe with high-temp sleeving rated to at least 500°F. Install a heat shield between the actuator motor and the pipe if clearance is under 2 inches.
- Fail-safe programming. Set the controller’s default state (power-loss position) to fully open. A stuck-closed valve at highway speed creates dangerous backpressure; a stuck-open valve is loud but safe.
- Initial map load. Upload the base map for your engine (RPM thresholds, throttle breakpoints). Most platforms ship a starting map; treat it as a baseline, not as a final tune.
- Test drive: low-load sweep. Drive at steady 1,500–3,500 RPM in third gear. Listen for drone bands and note the exact RPM where they appear.
- Test drive: full-throttle pull. Confirm the valve opens fully above the programmed RPM threshold and that throttle response feels unaffected.
Pro Tip: Record in-cabin audio on your phone during the test drive and run it through a free FFT app like Spectroid. The dominant drone frequency will show as a clear spike, giving you the exact Hz target for resonator tuning.
How do you tune out drone without hurting performance?
Target the offending frequency with resonator cavity tuning and valve mapping first, then verify with in-cabin spectral checks. That sequence matters because guessing at resonator size and hoping for the best wastes time and money.
Finding the drone frequency is straightforward: drone RPM multiplied by the number of firing events per revolution divided by 60 gives you the fundamental frequency in Hz. For a V8 at 2,200 RPM, that is roughly 147 Hz, which sits squarely in the low-frequency range where Helmholtz resonators outperform restrictive mufflers because they absorb energy at the target frequency without choking flow.
Sizing the resonator: cavity volume and neck geometry set the resonant frequency. A larger cavity lowers the target frequency; a shorter, wider neck raises it. For many V8 drone problems in the lower frequency range, a resonator cavity sized to fit typical underbody constraints with an appropriately proportioned neck diameter works as a starting point. Place the resonator as close to the drone source as packaging allows, typically just downstream of the primary merge collector. The role of resonators in exhaust systems is frequency-specific absorption, not broadband silencing, so placement relative to the standing wave node matters.
For valve mapping, build in transitional hysteresis of at least 200 RPM between the open and close thresholds to prevent valve flutter during steady cruise. At high-load, wide-open-throttle conditions, the valve should be fully open to preserve exhaust scavenging. Closing it even partially under boost on a turbocharged or supercharged engine raises backpressure and costs power. The exhaust’s role in forced induction makes this non-negotiable: scavenging efficiency drops fast when backpressure climbs.
Pro Tip: Avoid adding interior sound-deadening mats as a drone fix. Beyond being largely ineffective at low frequencies, cabin deadening can add up to ~80 lbs to the vehicle, which directly harms handling balance on a car tuned to tight weight targets.
What does a complete setup cost and how long does it take?
A bolt-on adjustable-valve plus resonator setup on a luxury sports car typically involves a mid-to-high range cost in parts and labor, with total expenses depending on fabrication complexity and controller sophistication.
| Item | Estimated cost |
|---|---|
| Actuators (pair) | $200–$500 |
Custom resonator fabrication and ECU integration are key cost drivers. Plug-and-play CAN controllers reduce shop time versus custom wiring. Bench and mechanical installation typically require several hours; resonator tuning and map calibration add additional time. Allocate adequate time for initial and follow-up tuning sessions after heat cycling.
Pro Tip: Book your final calibration session on a day you can also do a highway run. Sustained 65–75 mph cruise at 2,000–2,500 RPM is the hardest drone test, and you want the tuner present to make real-time map adjustments.
U.S. street-legal and decibel compliance best practices
Use a quiet default map for street driving and keep a documented decibel-checked configuration on file. That single habit prevents most enforcement problems.
- Confirm your city or county’s noise ordinance limit. Many U.S. municipalities enforce limits between 95–100 dB(A) at a specified distance, but limits vary widely. Supercar decibel management requires knowing your local number, not a national average.
- U.S. police typically measure using A-weighted dB(A) at 50 feet from the vehicle centerline or 20 inches from the tailpipe at a 45-degree angle, depending on the state statute.
- ISO 5130:2019 measurement protocols use dB© weighting for stationary tests; dB(A) is the street-enforcement standard in the U.S. The two scales diverge at low frequencies, so a resonator-tuned system that passes dB© validation may read differently under dB(A) enforcement.
- Program a “street mode” valve map that keeps the valve in the resonator-routing position below 3,500 RPM. That alone typically drops measured levels by 8–12 dB(A) at cruise.
- On California-registered vehicles, any exhaust modification must carry a CARB Executive Order number or the vehicle fails smog inspection.
Pro Tip: Carry a calibrated sound level meter app reading (or a professional meter printout) showing your street-mode dB(A) level. It is not legally binding, but it gives an officer context and has resolved roadside disputes for enthusiasts before a citation was written.
This article is general information, not legal advice. Check your state and local statutes, and consult a qualified professional for your specific jurisdiction and vehicle.
How do you maintain a valve exhaust system for long-term reliability?
Inspect valve travel and actuator response every 12,000 miles or once per year, whichever comes first. That interval catches the two most common failure modes before they strand you.
Carbon buildup is the primary enemy. Exhaust gases deposit carbon on valve edges and seats, gradually increasing the torque needed to open and close. Left unchecked, the actuator motor overloads and fails. A visual inspection with the valve in both positions, plus a manual travel check by hand, takes ten minutes and tells you immediately if resistance has increased. Actuator motor wear follows a predictable curve: the motor draws more current as carbon builds, which you can monitor on controllers that log actuator current. Wiring harness corrosion is the second common failure, particularly at connectors near the exhaust pipe where heat cycling causes connector housings to crack. Inspect connectors annually and apply dielectric grease at every service. For resonator chambers, check welds and canister walls for fatigue cracks at the 24,000-mile mark, especially on cars that see track use.
For valve maintenance on luxury cars, use a high-temperature anti-seize compound on valve shaft linkages, not standard grease, which burns off and leaves residue that accelerates carbon adhesion.
Pro Tip: Run the valve through its full open-close cycle three to five times during every cold start. The movement breaks up early-stage carbon deposits before they harden, extending actuator life significantly.
Key Takeaways
A valve-controlled exhaust with tuned Helmholtz resonators and a mapped controller is the most effective exhaust noise control setup for luxury sports cars, eliminating drone while preserving full throttle response.
| Point | Details |
|---|---|
| Plan parts and fitment first | Verify flange patterns, pipe diameter, and catalytic converter position before ordering any components. |
| Use Helmholtz resonators for drone | Resonator cavity tuning targets the offending frequency without the backpressure or weight penalty of restrictive mufflers. |
| Program a street-mode map | A quiet default valve map keeps you under local dB(A) limits and avoids enforcement issues on public roads. |
| Inspect every 12,000 miles | Check valve travel, actuator current draw, and wiring connectors to catch carbon buildup before it causes failure. |
| Valvecontrolexhaust for fitment | Valvecontrolexhaust supplies model-specific valve systems and 2026 setup guides for Audi, BMW, Ferrari, and Lamborghini platforms. |
Why resonator tuning beats every shortcut
The conventional wisdom says you can fix drone with enough cabin deadening. You cannot. Low-frequency exhaust resonance passes through the chassis as structure-borne vibration as much as airborne sound, and no amount of mat on the floor panels addresses the source. The physics are straightforward: you need to cancel or absorb the energy at the pipe, not try to block it after it has already entered the cabin.
What most guides understate is how much the valve map matters relative to the hardware. A perfectly sized resonator on a poorly mapped controller will still drone at the RPM transition points where the valve hesitates. The map is not an afterthought; it is half the system. Enthusiasts who spend $2,000 on hardware and then run the stock base map without iterative tuning are leaving most of the performance on the table.
The other thing worth saying plainly: this is not a weekend DIY project for most luxury platforms. The CAN integration, emissions compliance, and heat management on a Ferrari or Lamborghini require shop-level tools and model-specific knowledge. Getting the fitment right the first time costs less than correcting a botched install.
Valvecontrolexhaust: where to start your build
If you want a valve-controlled exhaust that actually fits your car without custom fabrication guesswork, Valvecontrolexhaust is the direct path. They supply complete adjustable-valve systems engineered for Audi, BMW, Ferrari, and Lamborghini platforms, with model-specific 2026 setup guides that cover wiring, resonator placement, and controller mapping for each application.

The process is straightforward: run a compatibility check on your model, select the valve and resonator package for your platform, and book installation through an authorized shop or use the factory-fit option Valvecontrolexhaust recommends for your car. Every kit ships with the base controller map and calibration notes specific to your engine configuration.
For owners who want exhaust customization built for luxury cars rather than adapted from a universal kit, or who need guidance on sound experience and valve control modes, the Valvecontrolexhaust site is the right starting point. Check your model’s compatibility and request a fitment consultation directly on the site.
Useful sources and further reading
- Numerical and experimental analysis of a hybrid muffler with Helmholtz resonators — EPJ Plus: Experimental validation of a hybrid reactive/dissipative silencer showing 10–15 dB© reductions across operating ranges under ISO 5130:2019 protocols. Essential reading for anyone sizing resonator chambers or evaluating baffle geometry.
- Sound Deadening for Exhaust Drone — Thermal R&D Performance: Practitioner-level explanation of why Helmholtz resonators outperform cabin deadening for low-frequency drone, including the weight penalty of mat-based approaches.
- Muffler Magic: How Does a Car Muffler Work? — DNA Mufflers: Clear technical overview of reactive vs absorptive silencer elements, impedance mismatches, and the tradeoffs between attenuation and backpressure.
- Performance enhancement using acoustic metamaterial baffles — Extrica: Documents a 40 dB transmission loss spike at 1,500 Hz using labyrinthine DENORMS-style baffles. Relevant for narrowband drone problems that standard resonators cannot fully resolve.
- Sound dampening assembly patent US7246680B2 — Patsnap Eureka: Patent describing compact bottle-neck resonator geometries for constrained underbody packaging, useful for tight fitment applications.
- CAN bus active noise control for engine exhaust systems: Academic paper on CAN-integrated ANC using engine speed as the primary reference signal and a variable step-size affine-projection algorithm for fast convergence.